Welcome to your July 2022 Dream Wardrobe.
UK SIZES 6-30
We’ve had some record temperatures here this month and it is not even August yet. SO this month I’ve treated you to a brilliant summer cover up.
About the fabric:
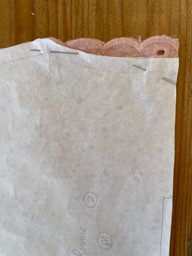
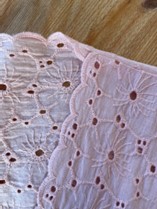
Broderie Anglais is everywhere and I am all for that. It is so pretty and just screams summer to me. I love that colour of this month’s Dream Wardrobe fabrics. I think the pale coral makes a fabulous alternative to white.
I didn’t line the dress for this months Dream Wardrobe but if you wanted to why not try a contrast cotton poplin to really make the design shout. This Broderie Anglais also have a lovely scalloped edge so you can have fun incorporating this into your sewing.
Here are some ideas for other patterns that would work really well in this fabric:
Bella Loves - Flor Dress and Top

I always recommend that you pre-wash your fabric. This is especially important with fabrics that are made from natural fibres (cotton, linen, viscose etc) as these have more of a tendency to shrink.
About the pattern:
The Fibre Mood Rosalie is a simple pattern, mine is made a little bit longer that the pattern as it was quite short and I have long legs. You will have enough fabric in your Dream wardrobe to do this as well if you like. I also think this pattern and fabric combo would be great cut down into a top or blouse.
Please note this pattern does not include seam allowances so make sure you add them on when cutting out your fabric. (you can use your sewing gift)
Other fabric ideas for this pattern:
Notions required:
All available form Fabric Godmother.
- Matching thread (we have sent you a reel of the Gutermann rPET thread made entirely from recycled plastic bottles)
About your gift:
Jen created these brilliant seam allowance markers for us, they are designed to ad 1cm seam allowance to any pattern. Check out her ‘How to’ video for tips on the best way to use them.
#fgdreamwardrobe
Please use the hashtag #fgdreamwardrobe and share your unboxing and makes on social media.
Happy sewing, Josie xxx
The Rosalie Dress
Prewash fabric
I found minimal shrinkage after washing a 10cm swatch at 40°C.
Ironing
I used almost the maximum heat setting on my iron and a little steam.
Tracing the pattern
Fibre Mood patterns do not have seam allowance included so you must add it yourself. There is a guide inside the booklet, showing how much to add to each seam. I traced off the pattern, adding it in to the pattern after. You can add the 1cm seam allowance easily by using your special 1cm seam circle. Jen has a great video on her website which shows how to use them. Jenerates seam circles
I chose the size based on the bust measurement and added 8 cm to the length as it is quite short. I would advise checking the finished garment length.
Cutting Out
There are lots of ways you can cut out this dress in order to incorporate the lovely border of this fabric or you can cut the pieces in the standard way and hem as the instructions outline.
I cut the skirt pieces across the fabric, so the edges are at the bottom of the skirt. You can match the hem line (not the cutting line) to the edge of the fabric as you will not need to turn up a hem.
I loved the idea of using the edge along the neckline, so I lined the edge of the neckline up with the edge of the fabric. This means that I actually cut the fabric off grain, so I took extra care not to stretch it when sewing.
For the back piece, I cut it without cutting out the curve. This means that the edge goes all the way around the neckline, but it comes up a little higher than normal at the back.

Alternatively, you can bind the whole neckline with bias tape or make your own with the fabric. I have previously used this fabric as self-binding and it is light enough to work well.
Another option is to bind the neckline of the back piece only, before attaching to the front pieces.
It is worth a matching up the edges of the back and front, prior to cutting, to see where the seams will meet. Ideally, you want them to meet at the same depth of scallop.
Transferring pattern markings
Make sure to transfer all the notches and be aware that, with the holes in this fabric, notches can disappear into them so ensure they are clear.
Making up the garment
I used a size 80/12 universal needle.
The seam allowance on the pattern is 1cm except for on the necklines where it is 5mm. Also, there is no seam allowance needed on the bias neck binding if you make your own. The instructions are illustrations only in Fibre Mood patterns but if you create an account on their website, you can access additional written instructions. Rosalie Dress Instructions
I edge finished all the seams with a 3-thread narrow overlocking (serging) stitch. This is my preferred method for overlocking woven fabrics which don’t easily fray. Simply remove and unthread the left needle of your overlocker (serger) to create a narrower stitch.
Step 1
I finished the edges on my overlocker, prior to sewing but didn’t press them open as suggested. Because of the scallop edge, it worked better to press both seams to the front as you can see in the photo. This may vary for yours. If you are using bias tape, press your seams open prior to attaching.

Step 2 and 3
I didn’t apply tape here but if you are using a tape made with the fabric, be aware that the stitching can make it thicker in places so take your time to avoid wobbly stitching.
Step 3 and 4
I finished the sleeve short edges with my overlocker prior to pining in place. Once attached, I pressed the sleeve and top of bodice side seam open.
To create the narrow hem, I stitched 5cm from the edge, all the way around. Next I folded on this stitch line and pressed again. A little tip here is to turn off the steam on your iron to avoid burning yourself. I try to ensure that the line of stitches is just inside the edge of the fabric. Then I stitched again as close to the edge as I can get (they suggest 2mm).
Now for the fiddly bit! You need to trim the leftover seam allowance. They suggest a pinking shears but I prefer to use a duckbilled appliqué scissors to get as close as I can. The closer you trim, the tinier your final hem.
Once it is trimmed, press the edge to the wrong side again and sew as close to the edge of the hem as possible. It is worth taking your time to get a neat hem.
Step 5
I created a tiny crossover with my two front pieces, so it didn’t gape above the seam line.
Step 6
They don’t suggest the distance for each line of gathering stitches, but I did one inside the 1cm seam allowance and one just outside. You can do a third line to create more precise gathers.
In the written instructions, they suggest sewing the gathers in place once you have checked the bodice against the skirt. I prefer to pin the skirt in place and adjust my gathers as I sew the bodice to the skirt.
Step 7
A sewers awl can be a useful tool for carefully adjusting your gathers as you sew.
Step 8
If you cut the skirt with the border on the hem of the skirt, you won’t need to hem at this point.
Another little tip! If you use the border fabric for around the hem or neckline, you may like to trim the scallop stitching where the fabric appears beyond the stitching. I made sure to use the tip of a very sharp scissors for this to give a lovely, neat edge.
Fibre Mood have a two part sew along available on Instagram for the Rosalie dress. The link can be found on their website.
Leftovers
I found that I had a lot of fabric left after making the dress and I like to try and use these pieces up so I have a few ideas of things you could make from any leftovers.
You may have enough to make the True Bias Ogden Cami top. If you don’t have enough for the facing you could use a light cotton or silk for the facing, extending the pieces to actually form a lining.
If, like me, you love broderie Anglais and have a number of smaller pieces, you could use a selection to make top like the You Made My Day Top 19 which is made up of smaller pattern pieces.
Left over broderie Anglais is fantastic for kids clothes and the Pattern Paper Scissors Indi Tunic & Dress would be great in this fabric or mixed with another.
Finally, it can be added to create beautiful touches to a garment. For example it could be the ruffle added to a Bella Loves Flor Dress , to add an interesting yoke panel to a Makyla Creates Dua Blouse & Dress or even a statement sleeve on a Fibre Mood Mindy dress.


