Welcome to your February 2023 Dream Wardrobe.
UK SIZES 6-18
Does a denim boilersuit count as a wardrobe staple? You bet it does! Especially when it is a classic flight suit like the Blanca in a classic indigo denim.
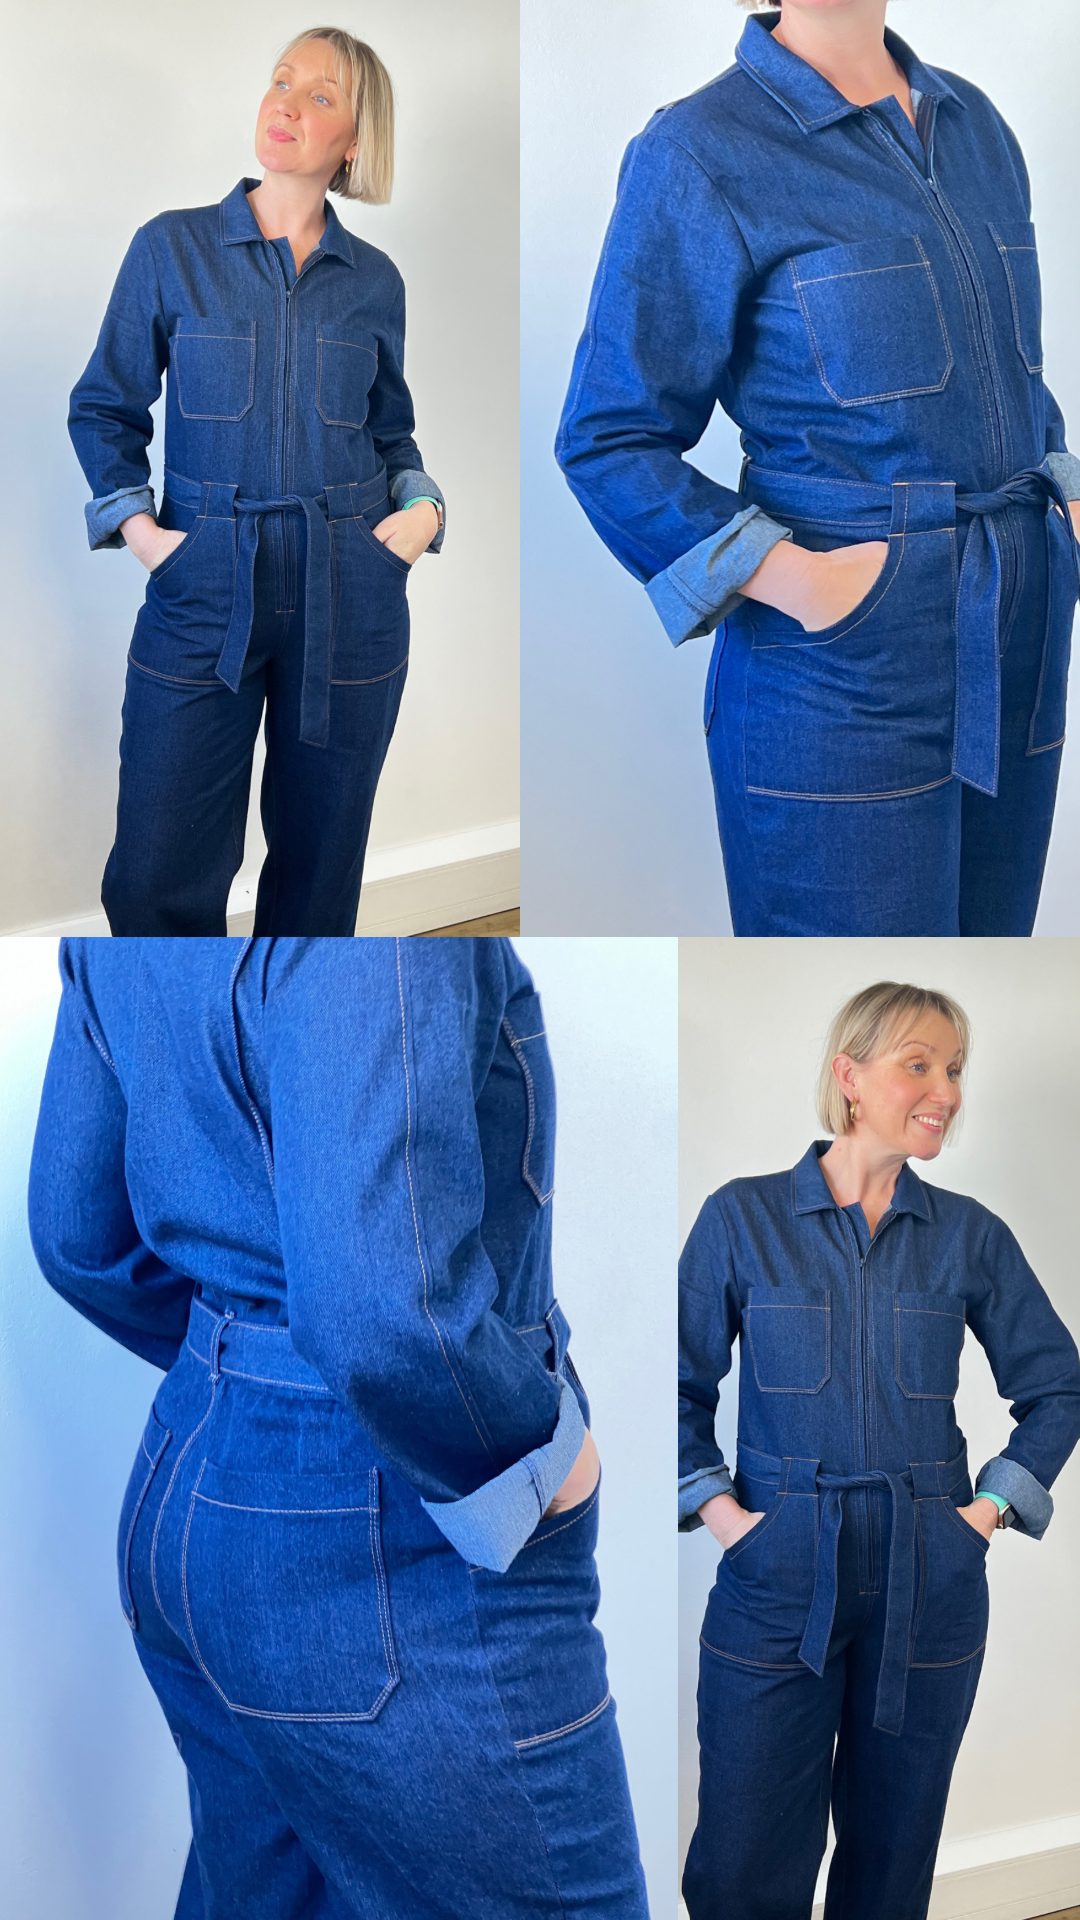
I am a big fan of a jumpsuit and I am planning to get lots of wear from this one!
About the fabric:
This is a 7.5 oz denim in a classic Indigo wash. We have sent you 3.2m.
I always recommend that you pre-wash your fabric. Here is my Denim care guide
When pre washing your denim we suggest using the following steps:
- Make sure your denim is unfolded completely before putting it in the washing machine.
- Use a tennis ball or dryer ball in your machine to ensure the denim keeps moving while being washed.
- Use a dye catcher sheet (available from most supermarkets) to catch any loose dye.
- Add table salt in the washing machine to help fix the dye.
- Make sure you remove the denim from the washing machine as soon as the wash has finished.
- Shake out any creases in the denim while still damp and dry flat.
It is advisable to repeat these washing instructions for the first few washes.
Remember, indigo denim will naturally soften and lighten over time and washing, so if you want to preserve the crisp finish you need to minimise the number of times you wash this fabric.
This weight is ideal for jumpsuits but would also work really well as:
Sew To Grow Sydni Shirtdress & Top PDF (Intermediate)
Megan Nielsen Dawn Jeans (Intermediate)
Tessuti Tokyo Jacket SIZES 6-16 (Intermediate)
How to use up your scraps…
There are so many amazing idea for denim scraps, I love the Closet core scrap pouf, a free pattern that is perfect for denim as it is nice and strong.
About the pattern:
The Blanca Flight Suit is a semi-fitted, highly customizable boiler suit pattern inspired by vintage workwear. With multiple sleeve and leg options, it can be made in a variety of fabrics and can easily be styled up or down.
Notions required:
- Matching thread (we have sent you a reel of the Gutermann rPET thread made entirely from recycled plastic bottles)
- Medium weight fusible interfacing (0.5yd/0.5m for 45” wide interfacing)
- Pocket lining (0.25 yd/0.25m)
- Non-separating zipper (use metal teeth for sturdy fabrics and plastic for lighter weight fabrics). Please note a longer zipper may be used and trimmed to size. Separating zippers can also be used if properly closed with a bar tack.
I think the Indigo denim is the perfect match for this pattern. But you could also use this pattern to make a version in one of the following fabrics
Enzyme Washed Eco Linen - Chartreuse
Checkerboard Cotton Twill - Blue
About your gift:
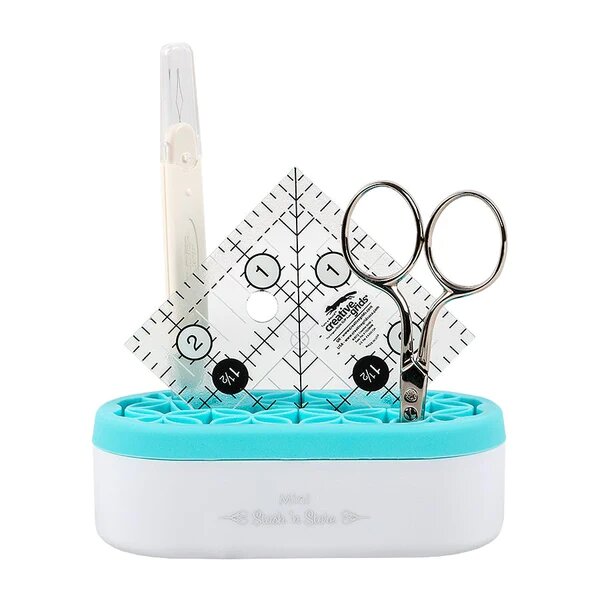
We thought that a Utility pattern should be accompanied by a utility gift! Therefore, this month we have included a Mini Stash n Store the perfect organiser for the sewing tools.
#fgdreamwardrobe
Want to share your Dream Wardrobe? Use the hashtag #fgdreamwardrobe and share your unboxing and final makes on social media.
Happy sewing, Josie xxx
Blanca Flight Suit- Julia's Sewing Notes
I’ve loved making up this sample, but be warned, this project is quite involved and is not a quick make. It took me approximately 12 hours to complete. It’s definitely worth taking your time to work though the construction methodically, transferring all the pattern markings and being precise with pressing and stitching.
I made the long sleeve version for Josie with the tie belt and plain patch packets (not the zipped ones). I omitted the hem tabs and tapered sleeve snaps.
There’s a huge amount of information in the instruction booklet and on Closet Core’s website to help you with your project, including fitting advice and a sewalong. You can find this here:
https://blog.closetcorepatterns.com/category/our-patterns/blanca-flight-suit/
As always, I’ve added my own sewing notes below:
Prewash fabric
Josie has some tips on this, see the Denim care guide above.
Ironing
This fabric irons beautifully and easily. I used the maximum heat setting on my iron and lots of steam.
Cutting Out
Check the sizing carefully. There’s lots of ease in the bodice but not a lot of ease in the hips so you may need to pick a size larger for the lower part if you want more room for movement.
Other than blending between sizing and adding a little length to the legs I didn’t do any other pattern alterations. I added elastic into the back waistband to give a little waist shaping. I’ve explained how and when to do this in the information below.
Since the denim is a little heavy, I used a plain navy cotton lawn for the pocket lining pieces to avoid extra bulk.
Transferring pattern markings
Make sure to transfer all the notches – I use a tiny snip in the centre of the notch marking. There’s also lots of small circle markings to indicate pocket placement. I used tailor’s tacks to mark these but you may find that marking these with chalk avoids the issue of losing the tailor’s tacks as you work though the construction process. To mark the tuck line on the back bodice I used a continuous speed tack which is described in the instruction booklet.
Making up the garment
I used a size 100/16 universal needle as the fabric is medium / heavy in weight and there’s also lots of layers to stitch through. To keep track of the needle type that’s in my machine, I write the needle type on a piece of masking tape and stick this to my machine.
The seam allowance on the pattern is 1.5cm.
After cutting out the fabric, I edge finished some of the fabric pieces. As the fabric is a medium weight it’s easier to edge finish before a seam is made. I edge finished the following: legs, side seams of sleeves, side seams of front and back bodice, centre front edges of front bodice, short edges of waistband, side seam edge of hip pocket and lining.
I used a 3-thread narrow overlocking (serging) stitch. This is my preferred method for overlocking woven fabrics which don’t easily fray. Simply remove and unthread the left needle of your overlocker (serger) to create a narrower stitch.
Topstitching
There is a lot of topstitching in this project. If you’re purchasing topstitching thread in 30m spools for this project I’d advise you to buy 3 spools so you don’t have the panic moment of running out mid project. My machine isn’t a big fan of topstitching thread so I used ‘Extra Strong Thread’. This is slightly thinner than topstitching thread so you may find this works better in your machine too.
Alternatively, you can use two strands of general purpose polyester thread for extra thickness, or keep it simple and topstitch using 1 strand of general purpose polyester thread.
Use topstitching thread in the needle and regular polyester thread on the bobbin. I used Extra Strong Thread in colour 887 which I think is a perfect contrast on the denim fabric. You don’t have to match the thread colour in the bobbin to the topstitching thread, I used a navy bobbin for most of the project.
Test out your topstitching on some scraps. I find a longer stitch length of 3.5mm works best on my machine. You may also need to adjust the presser foot pressure (If your machine has this option) to work with thicker fabrics.
When you begin and end your lines of topstitching don’t back tack as this can leave large knots of thread on the underside of your work. Pull the topstitching thread through to the wrong side of the fabric after stitching, knot the ends and weave in the thread for an invisible finish.
As a sewing teacher I have the luxury of having a few ‘spare’ sewing machines that I use for my classes. To make the construction process easier, I thread up one machine with topstitching thread and the other with regular sewing thread. This saves a lot of time on having to swap over from regular to topstitching thread.
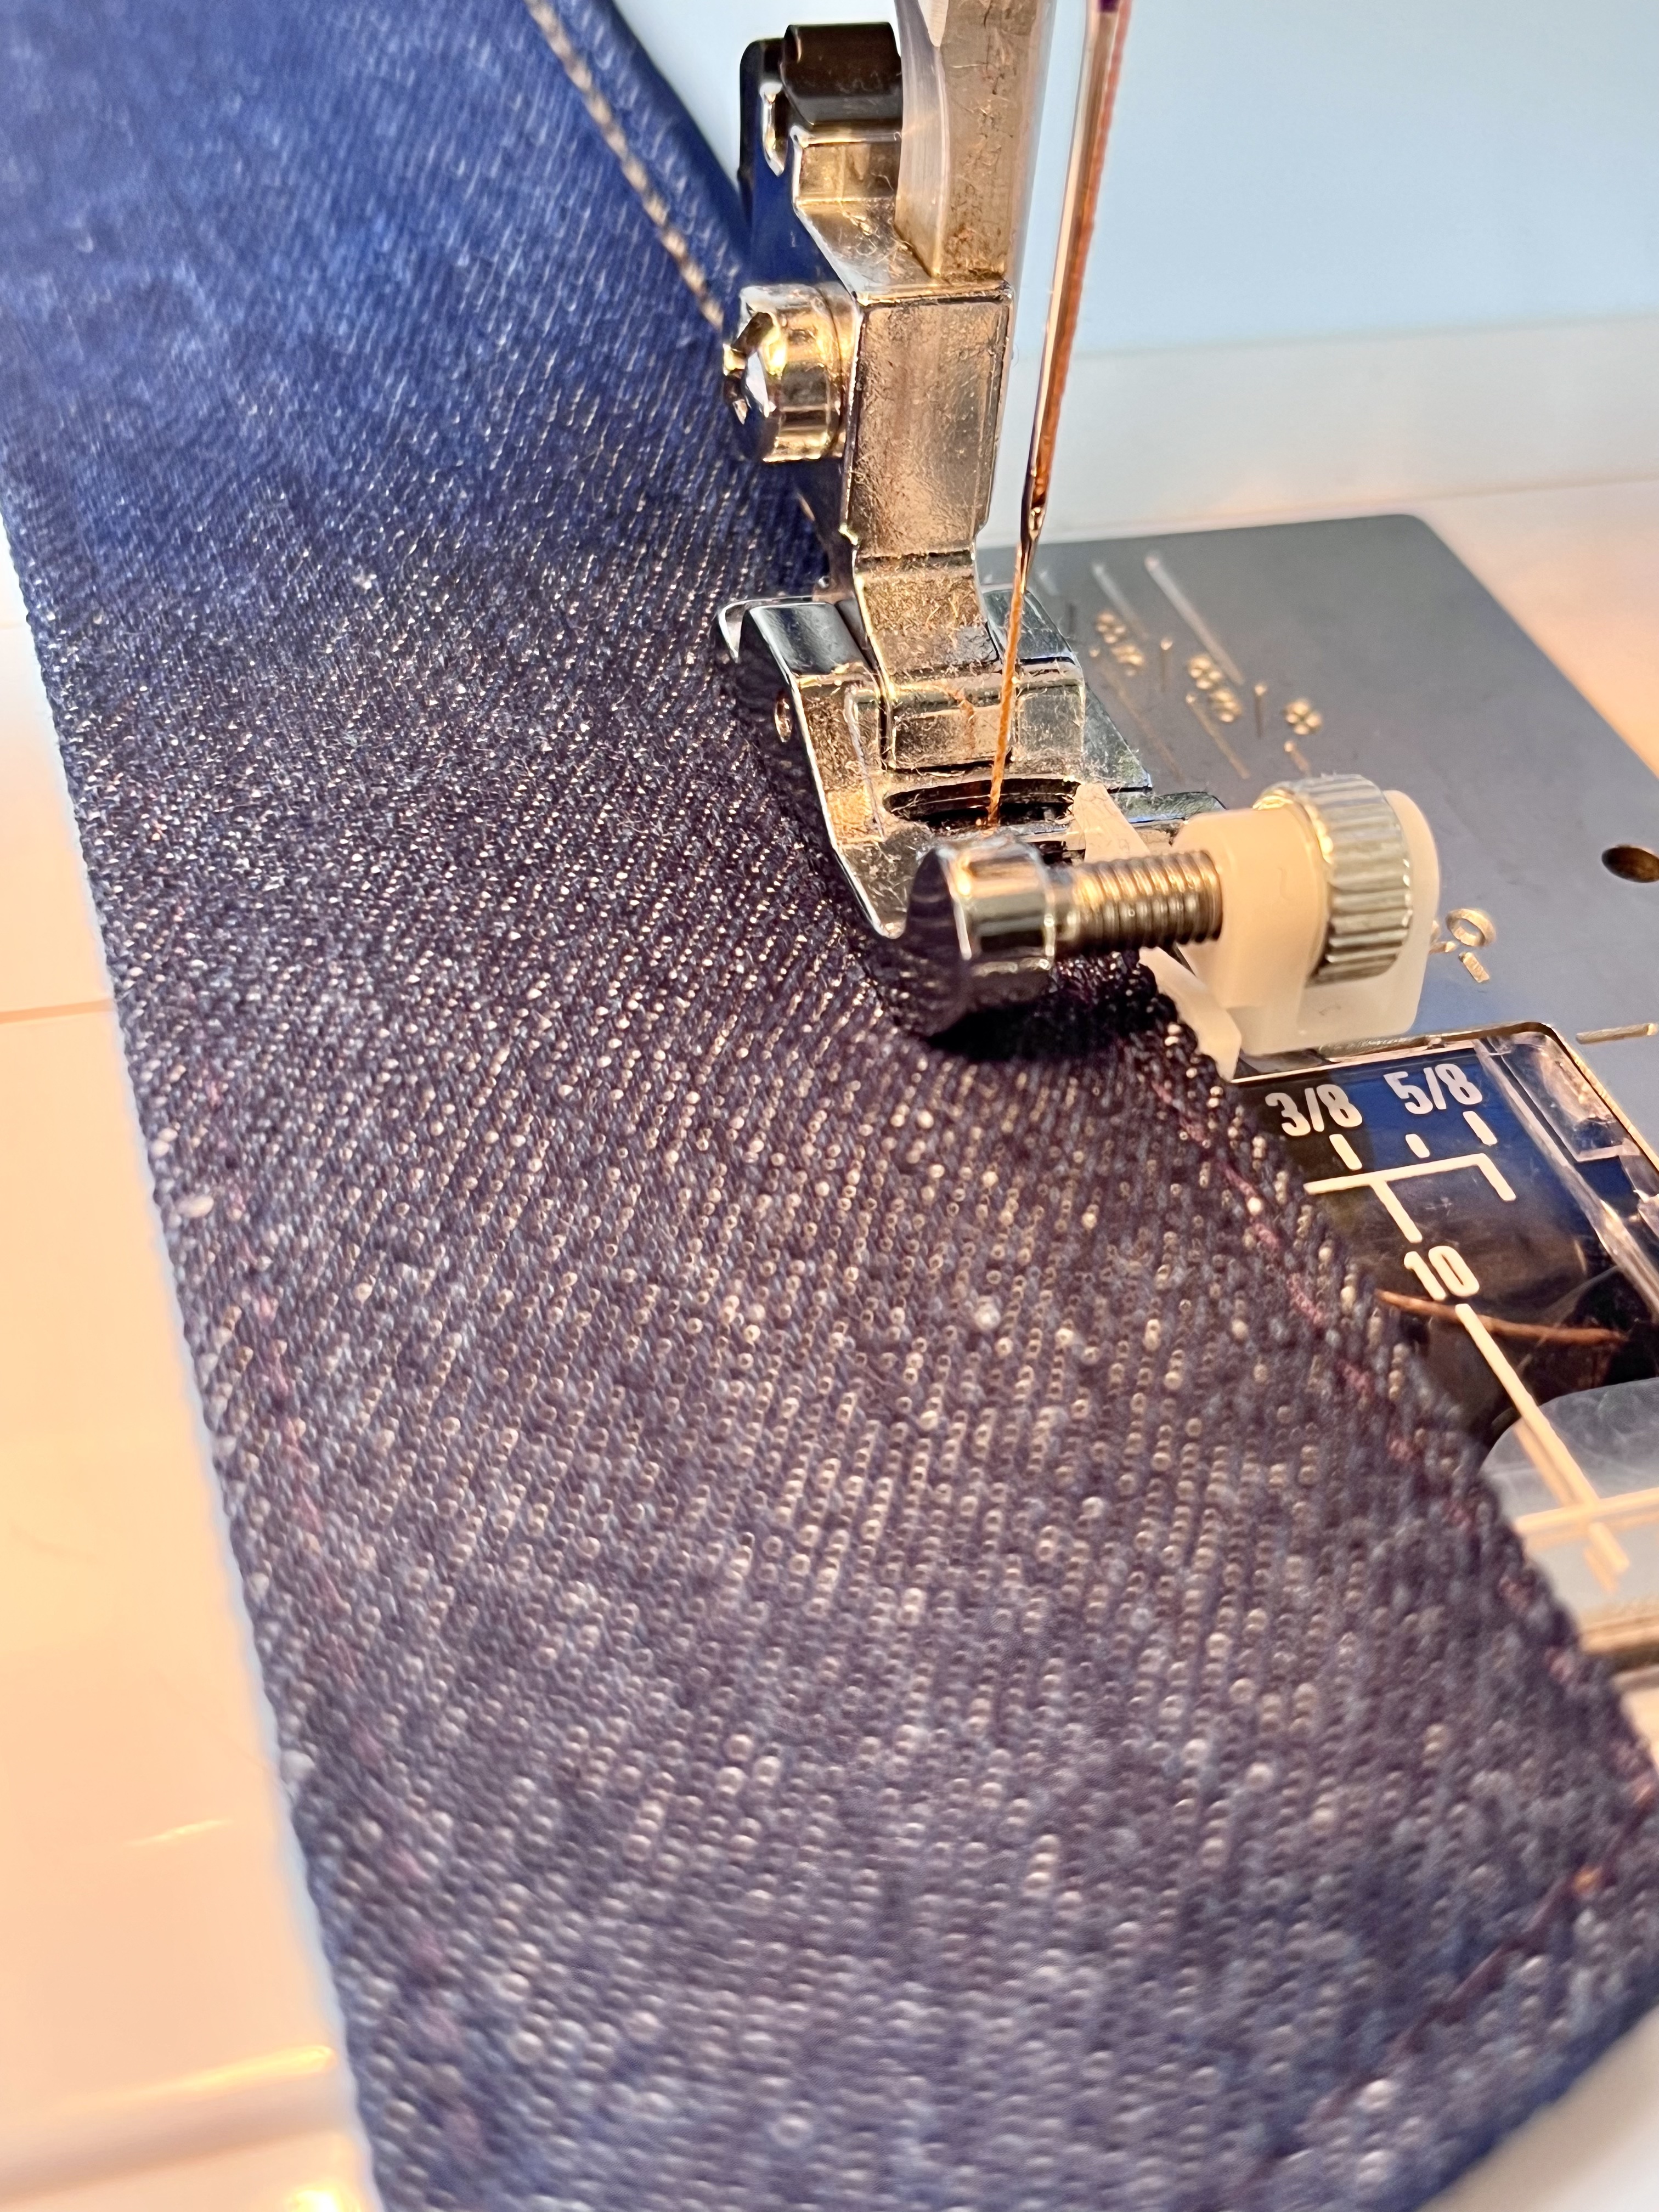
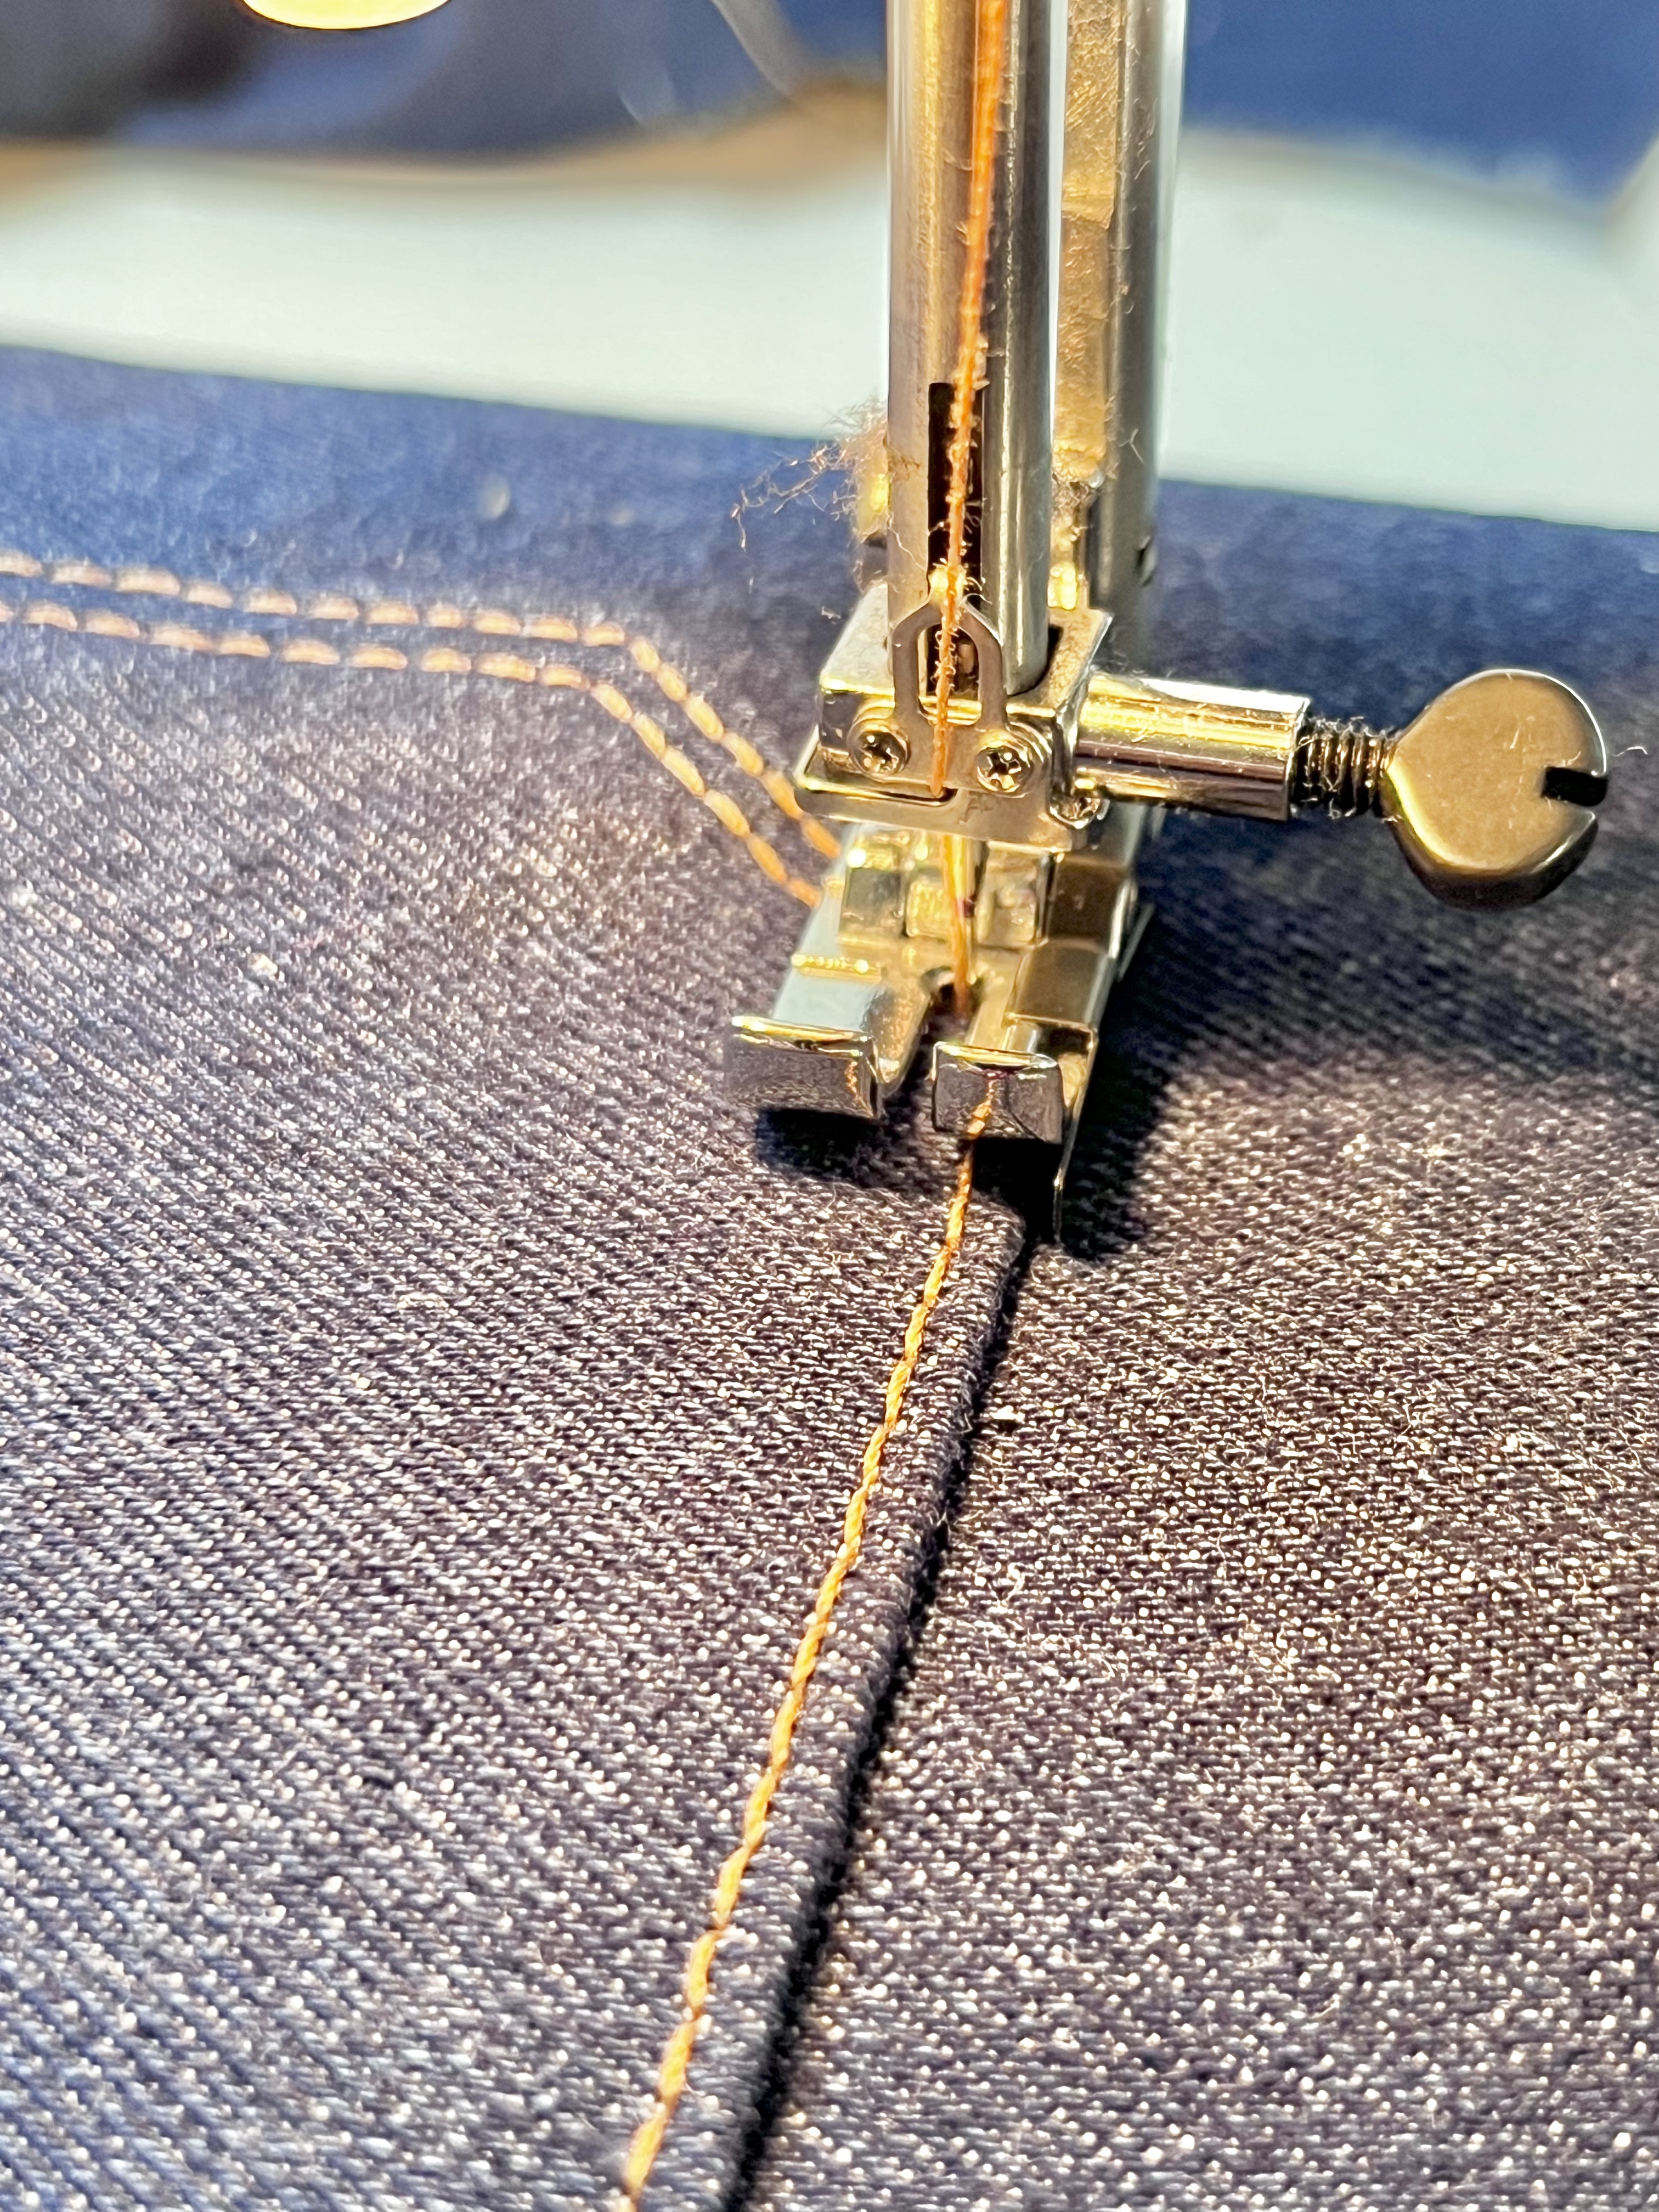
On the belt and collar I wanted to have the topstitching thread showing on both sides of the fabric. I used a navy thread in the bobbin and stitched once from the top side of the fabric, and then stitched again, sewing on top of the navy line of thread to give a double-sided topstitched finish. You can see the 2nd line of stitch in progress in the first picture below where I’m stitching on top of the navy thread.
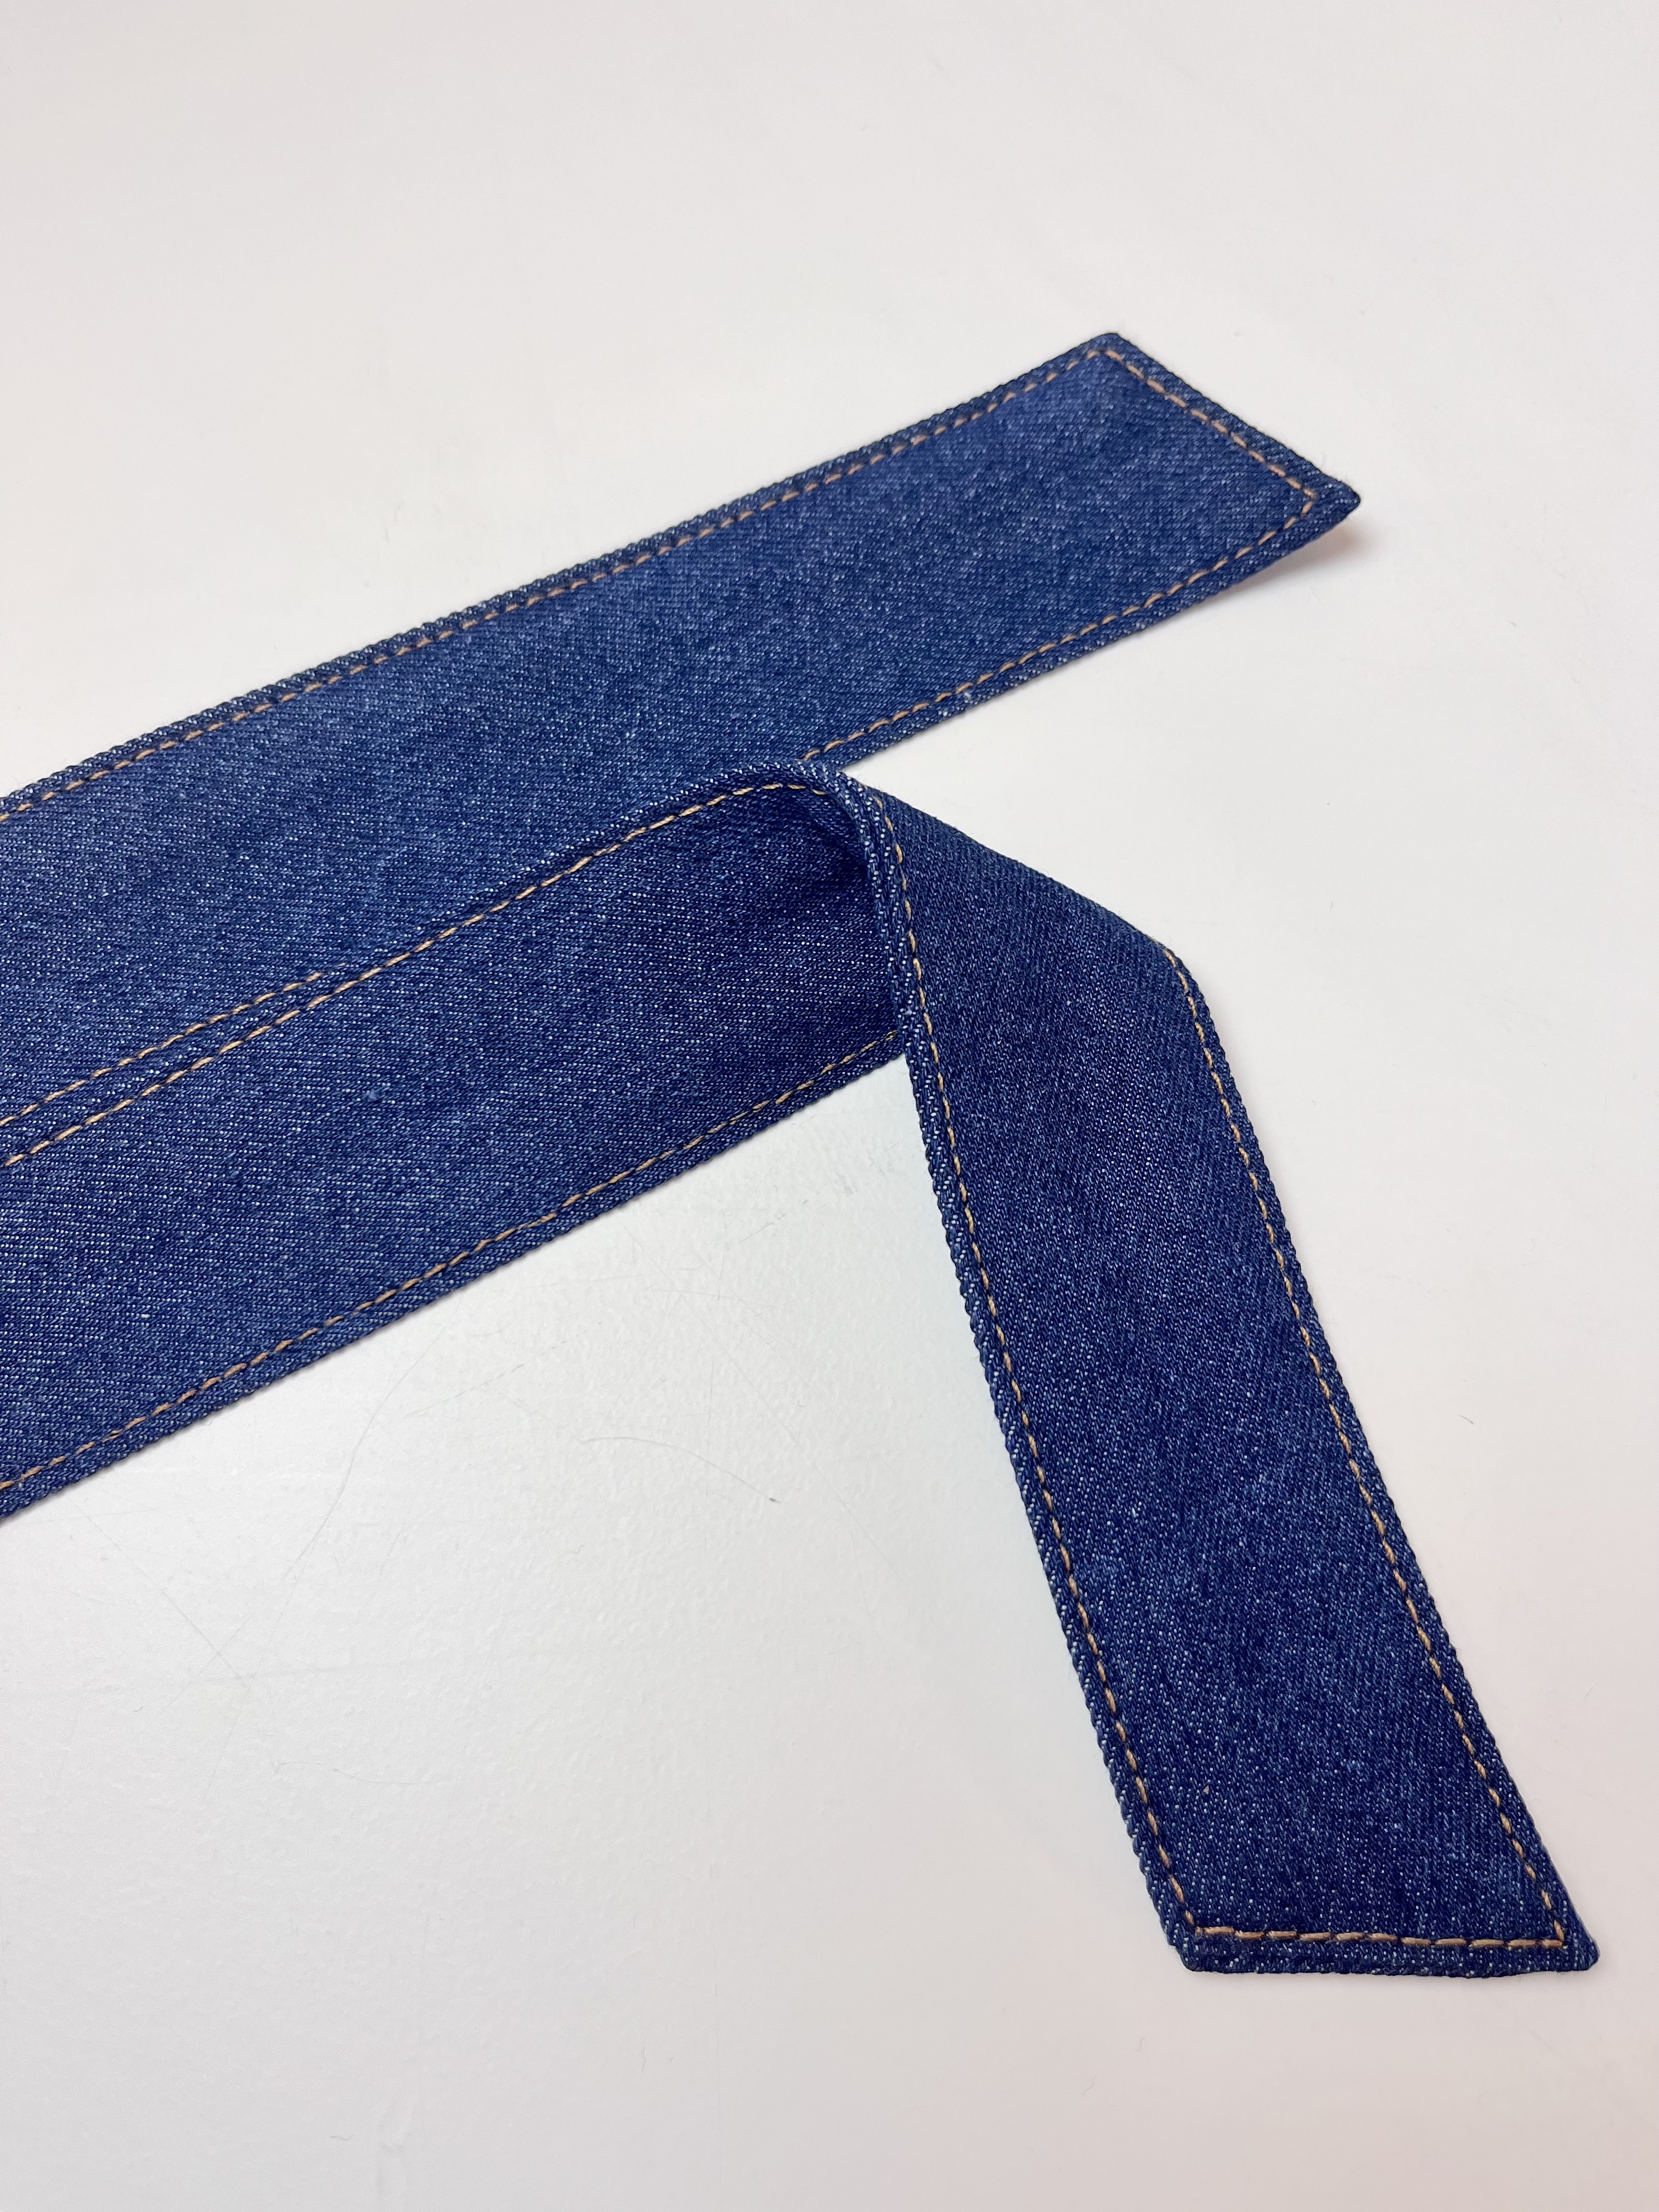
The next photo shows the finished belt with the double-sided topstitching finish.
There’s lots of bulky seams to stitch over so make sure that the presser foot is flat and not sitting at an angle when you are sewing. This will avoid the ‘birds nesting’ of threads as you start a line of stitching or skipped stitches in the middle of your work. Use a height compensation tool (otherwise known as a clearance plate, hump jumper or jean-a-ma-jig) behind or in front of the presser foot to maintain a flat position. A piece of folded over fabric or cardboard works perfectly if you don’t have one of these plastic tools. I used the height compensation tool throughout this project for most stages of construction.
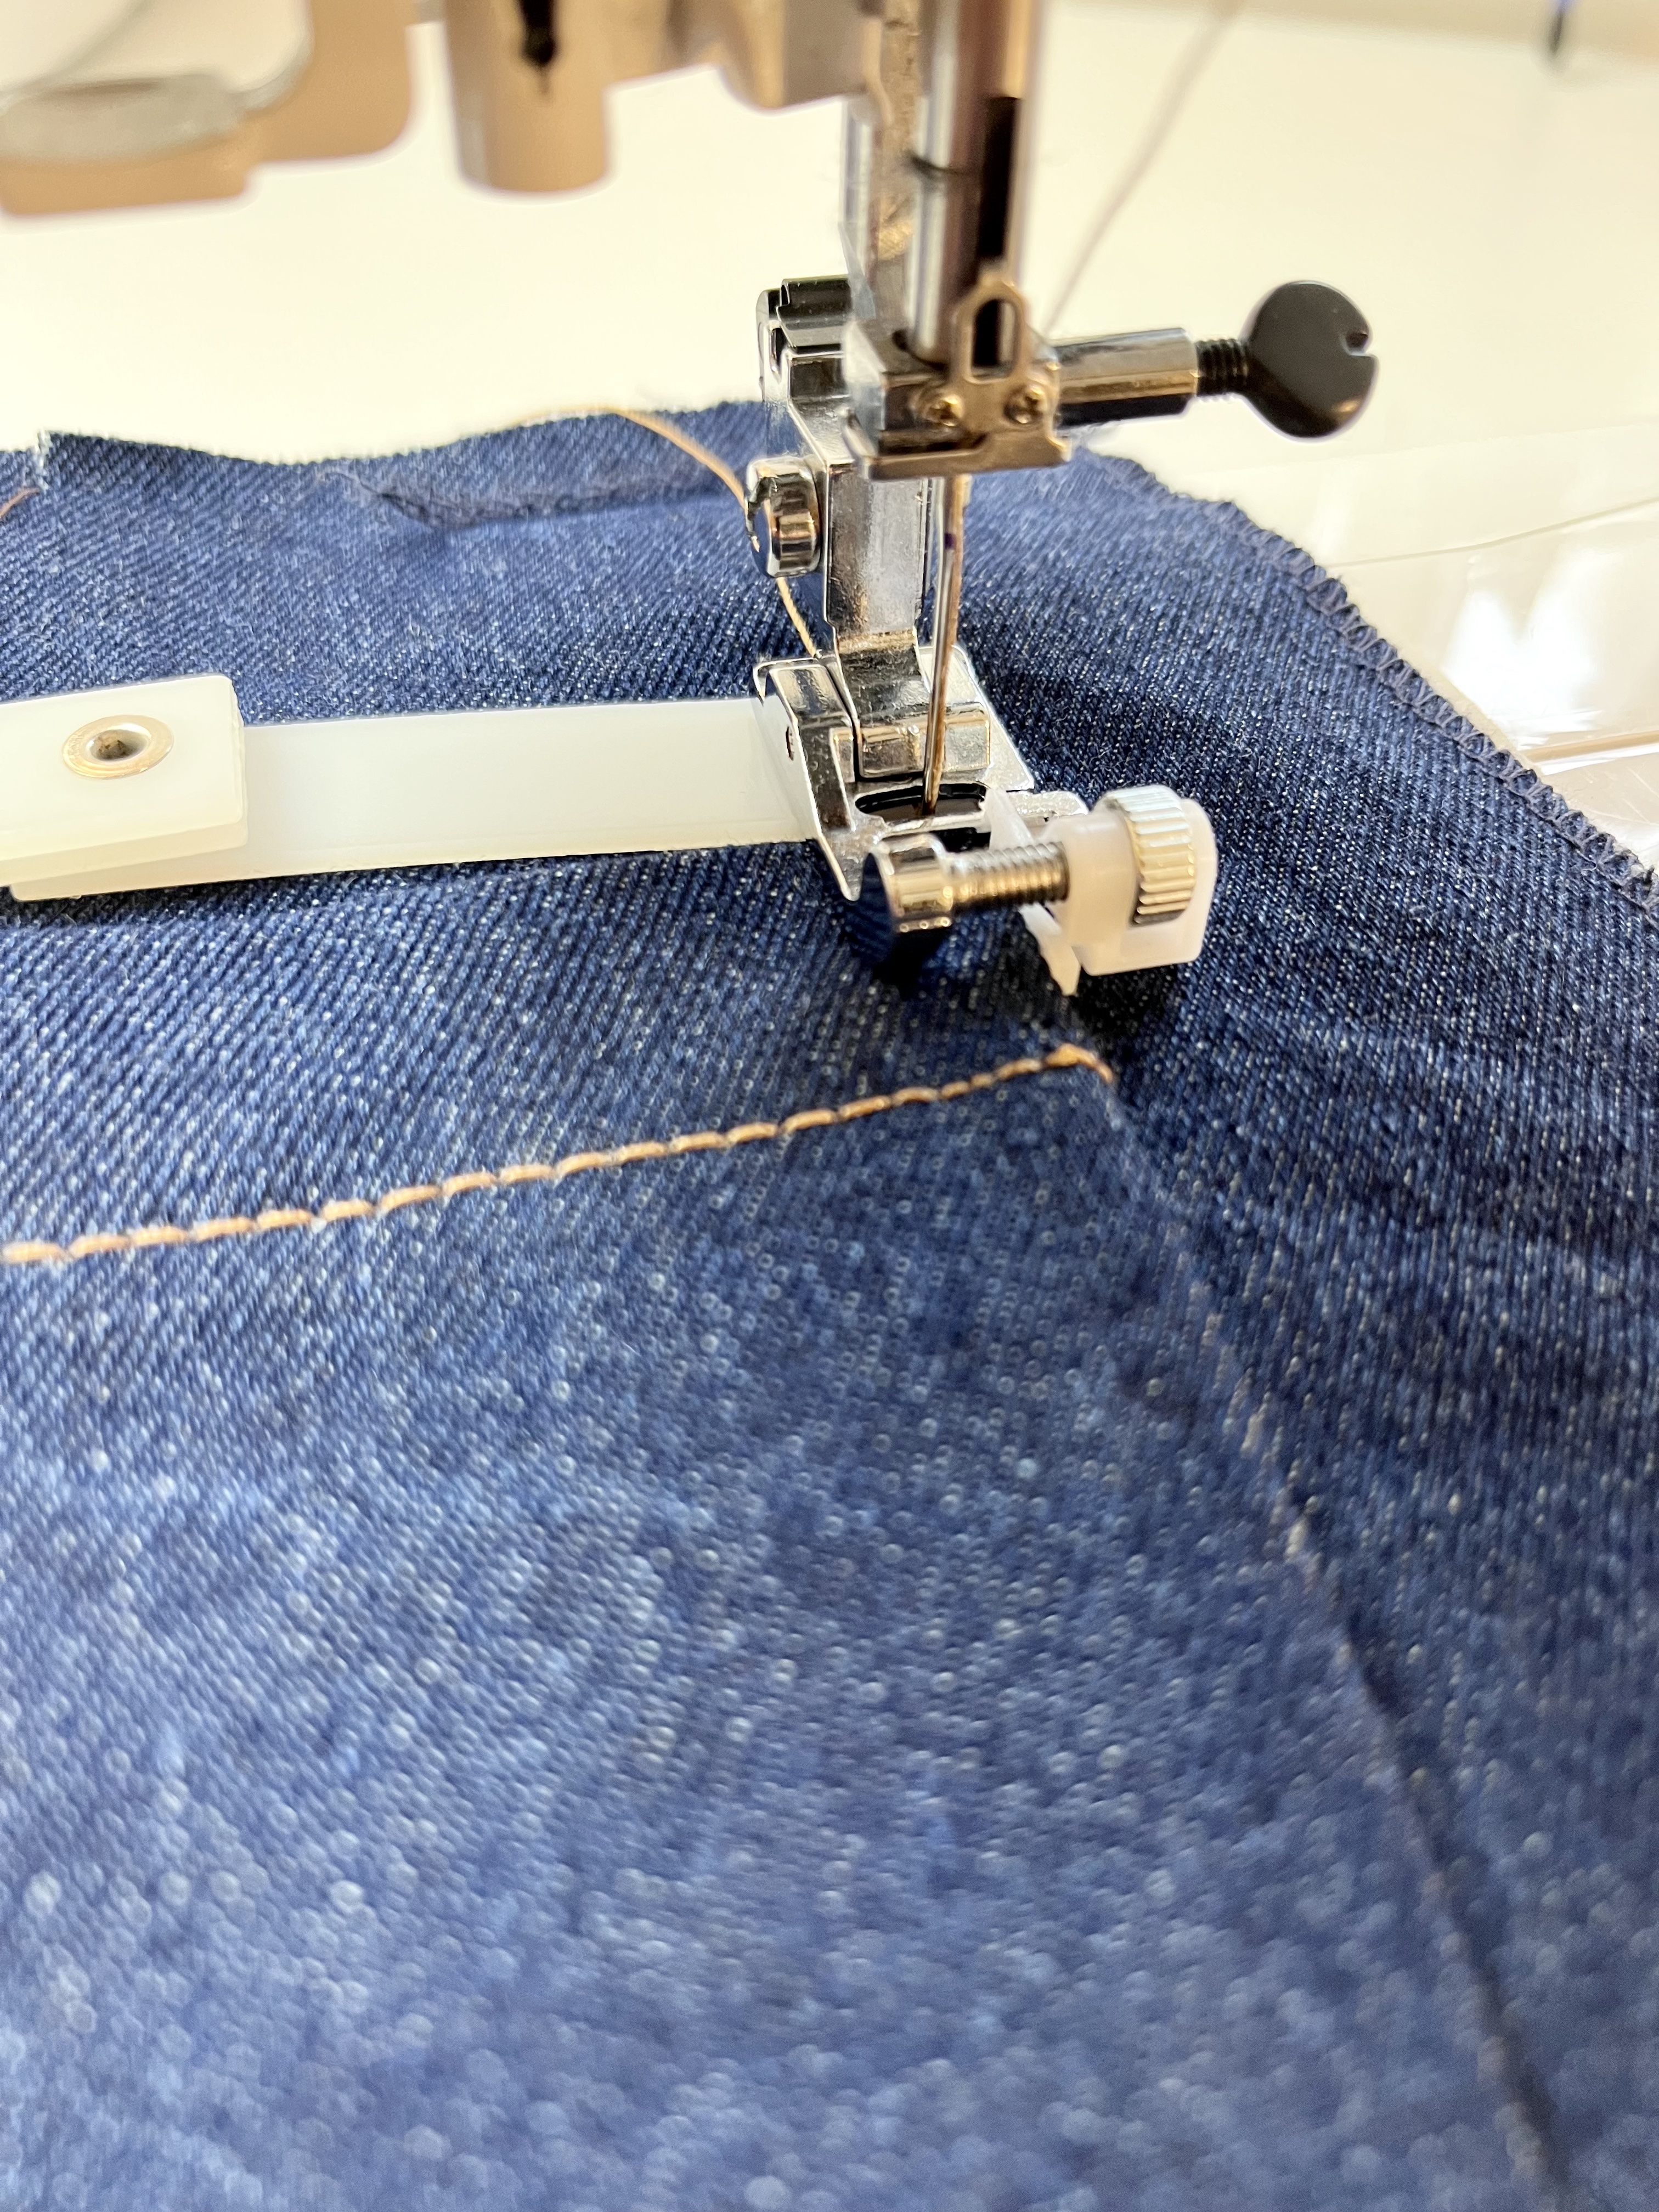
To keep the topstitching straight and evenly spaced, I use a blind hemming foot for edgestitching close to the seam line or close to an edge (where the instructions indicate to topstitch 3mm (1/8”) from the edge). The white guide on the right of the foot can be adjusted to the desired position.
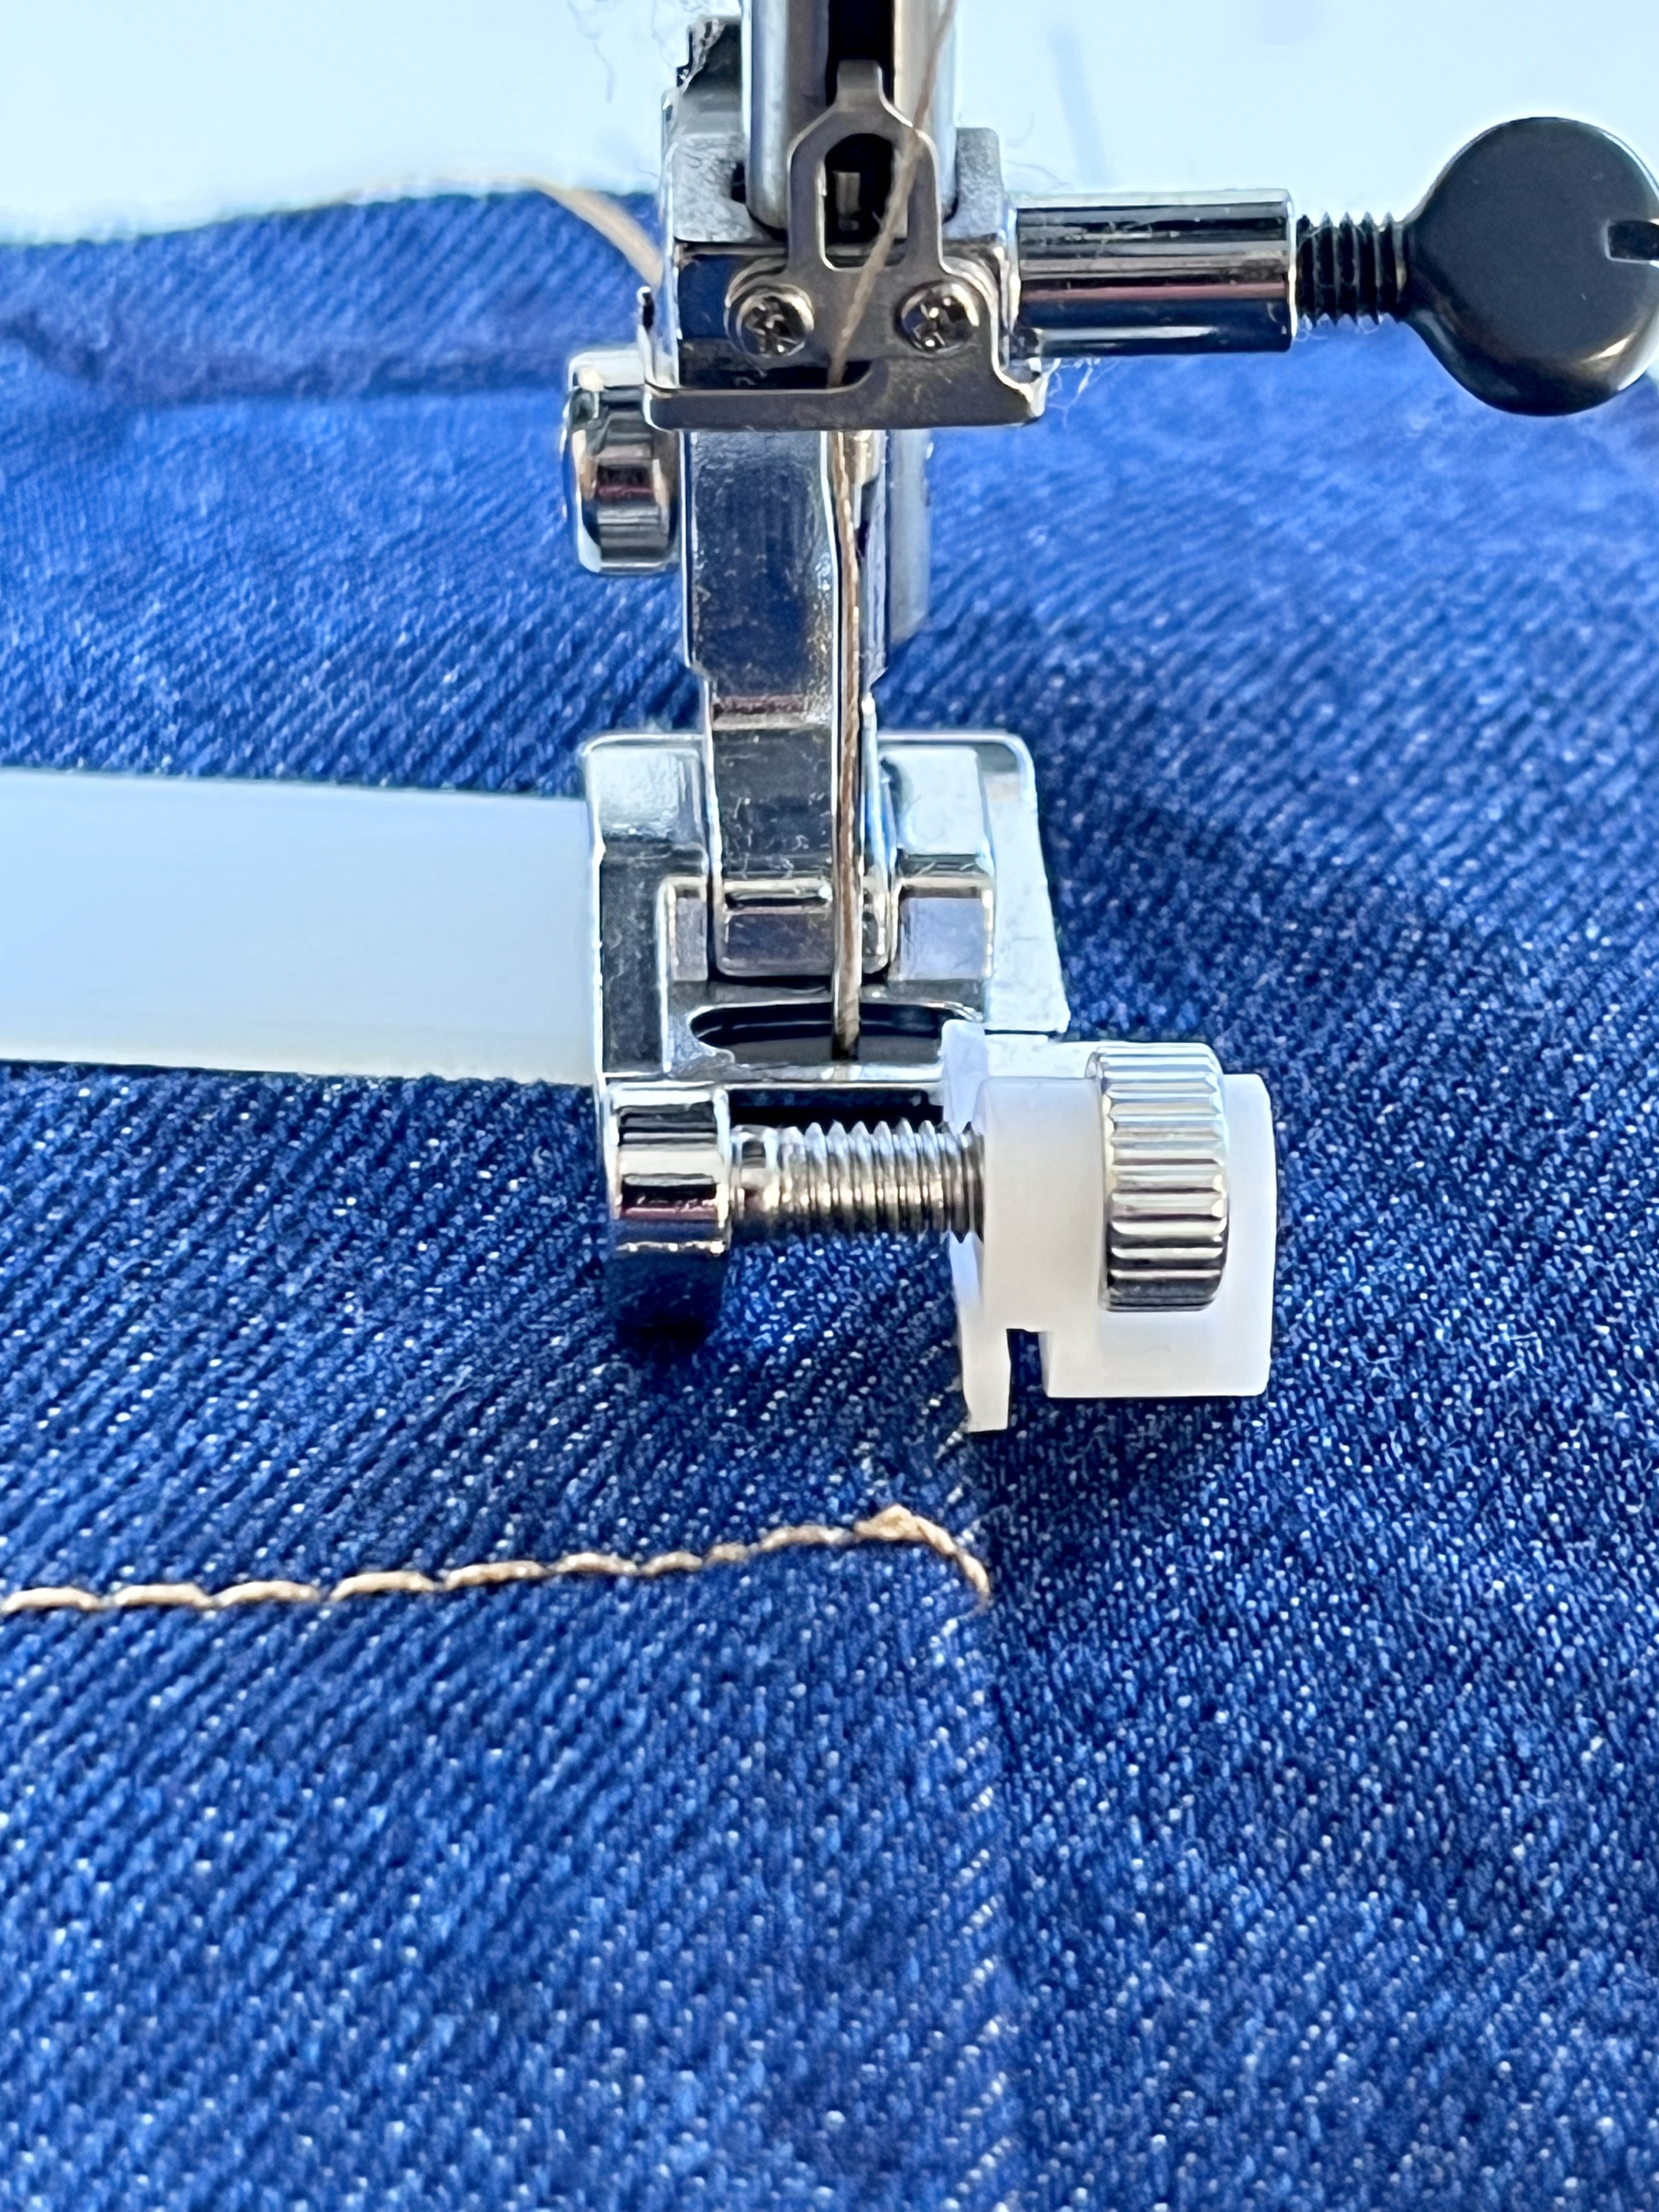
Then I use either another marker just inside the screw on the blind hemming foot, or a 1/4 inch (6mm) foot to sew the second line of topstitching.
Construction Notes
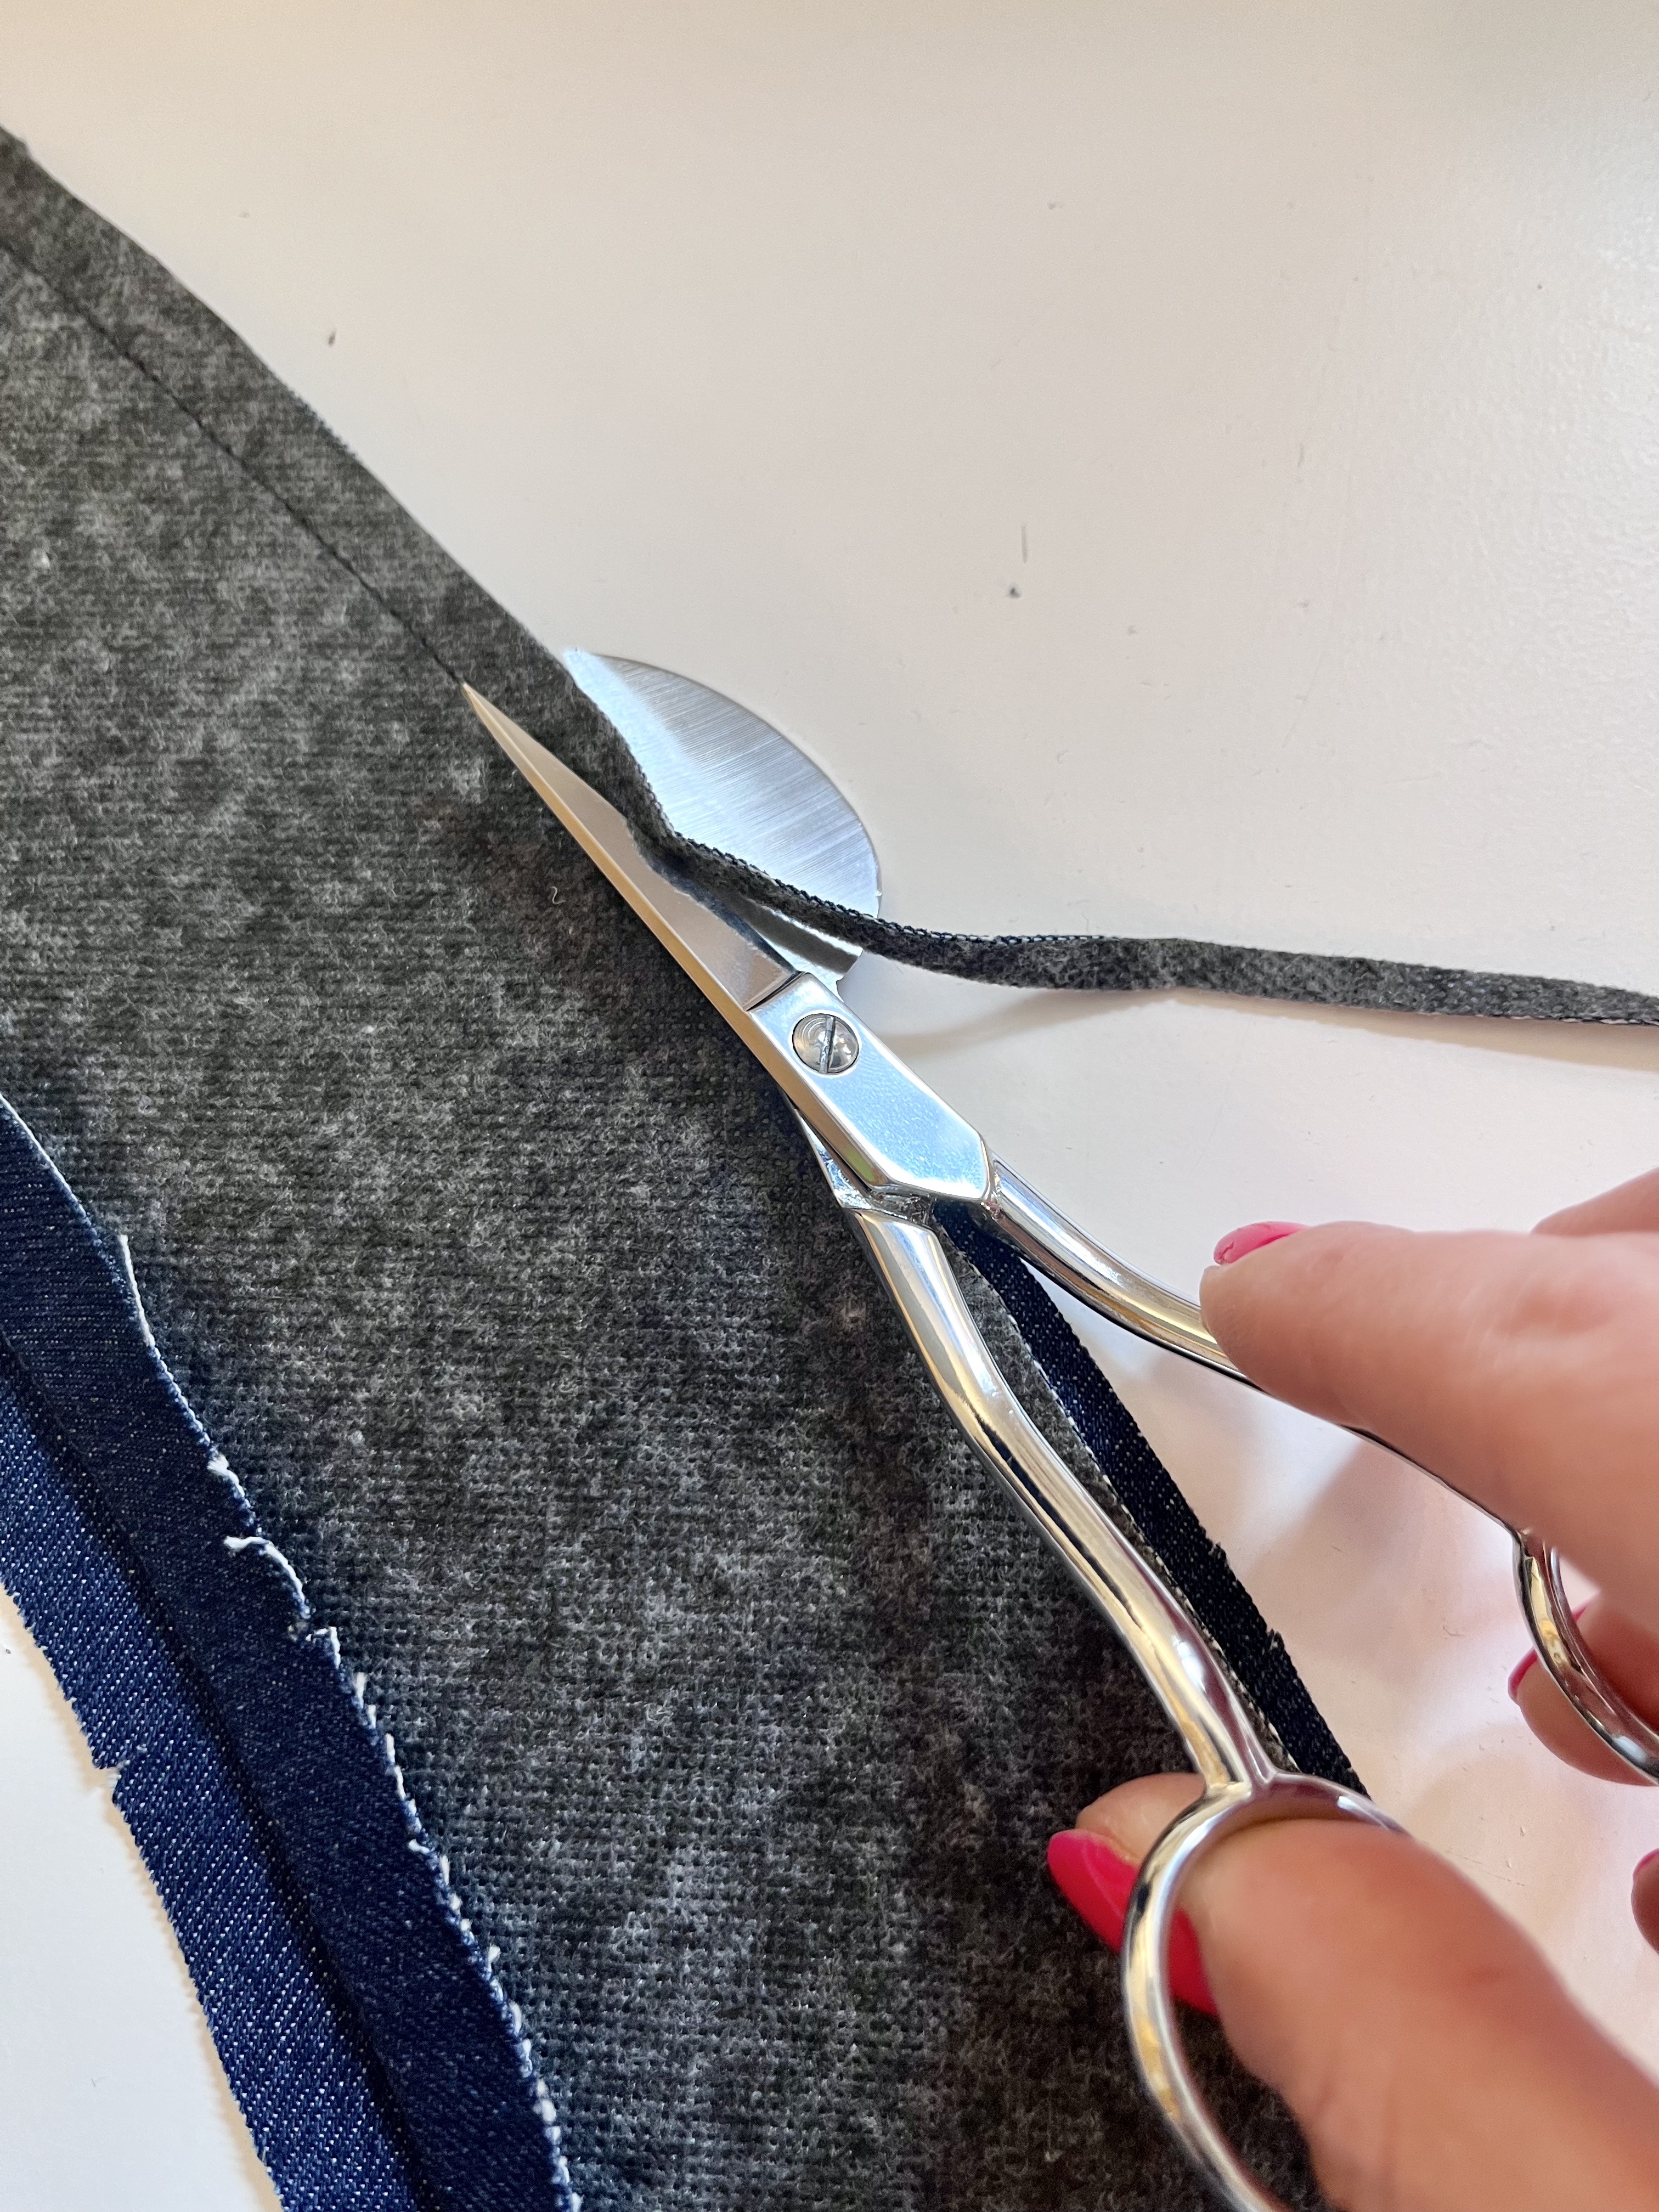
Make sure to grade seam allowances as you go along. This is noted in the instructions. I love using my duckbill scissors for this as they keep one layer of the seam allowance out of the way while I trim the other one.
Waistband
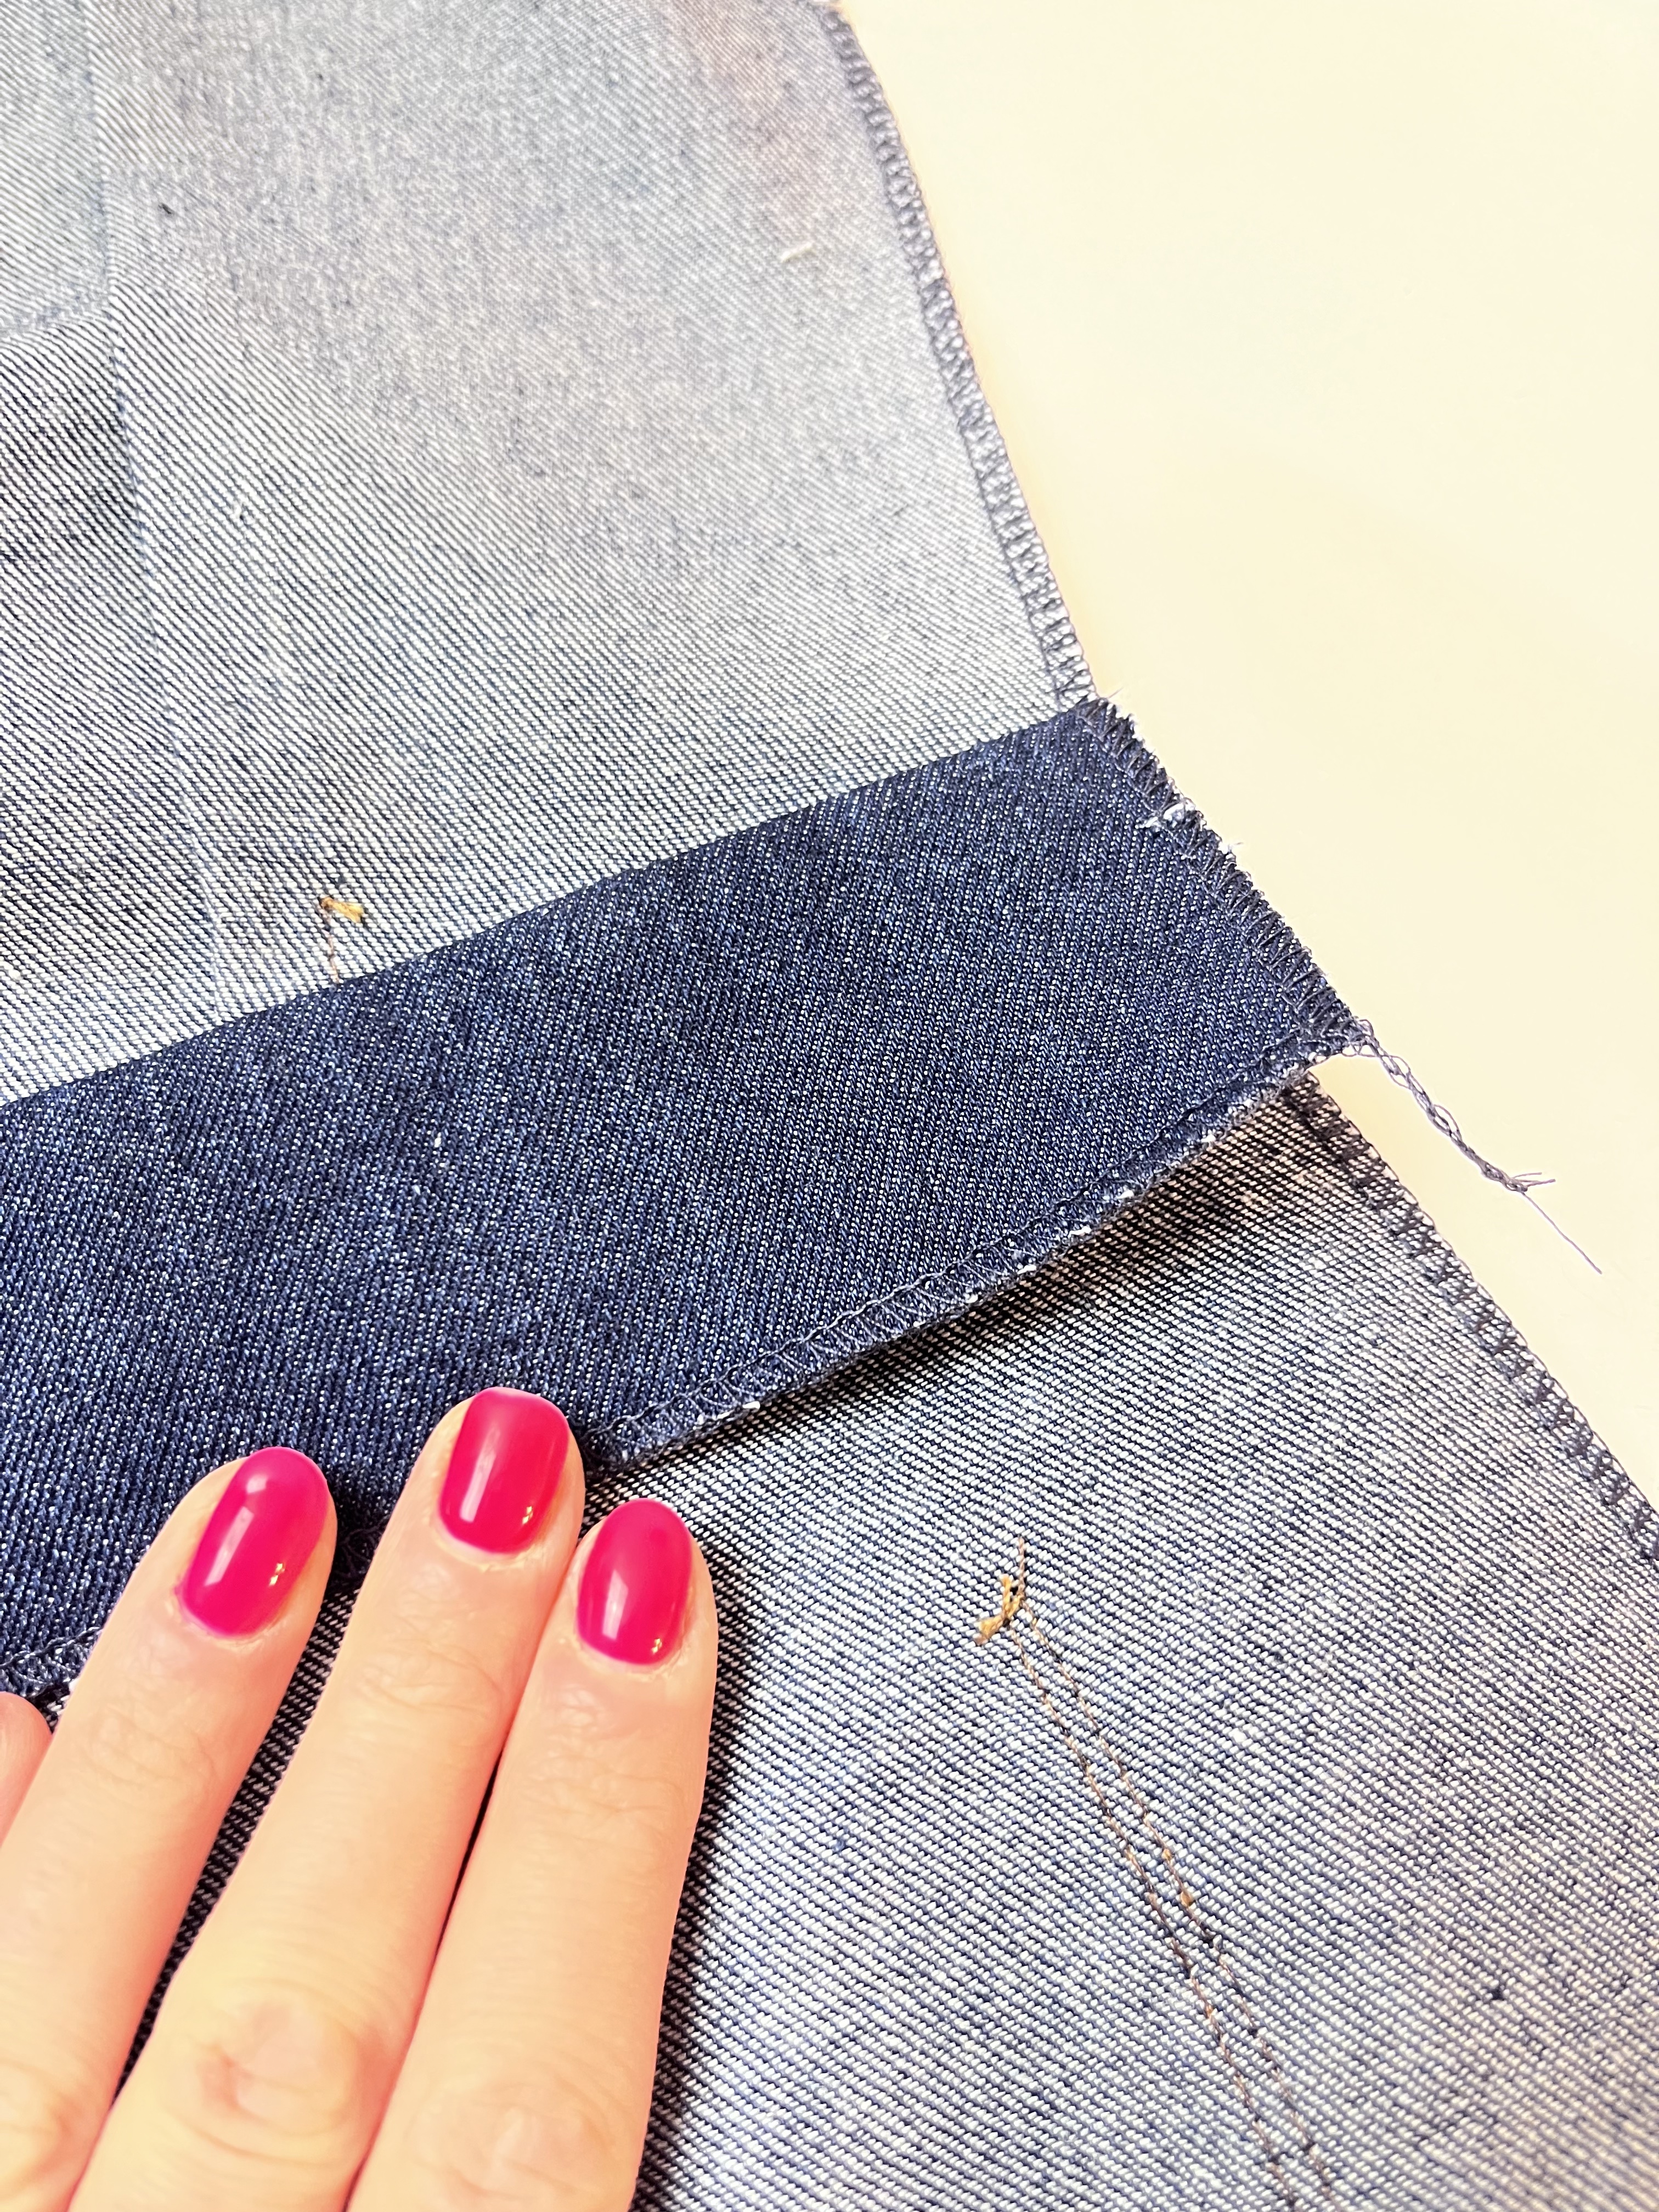
On the waistband, instead of pressing under the bottom raw edge of the waistband facing, I trimmed this down by 5mm (1/4”) and overlocked this edge. This was then secured by ‘stitching in the ditch’ as described in the instructions. You can see the steps below:
Overlock the lower edge of the waistband facing and make sure to grade the seams of the waistband and bodice.
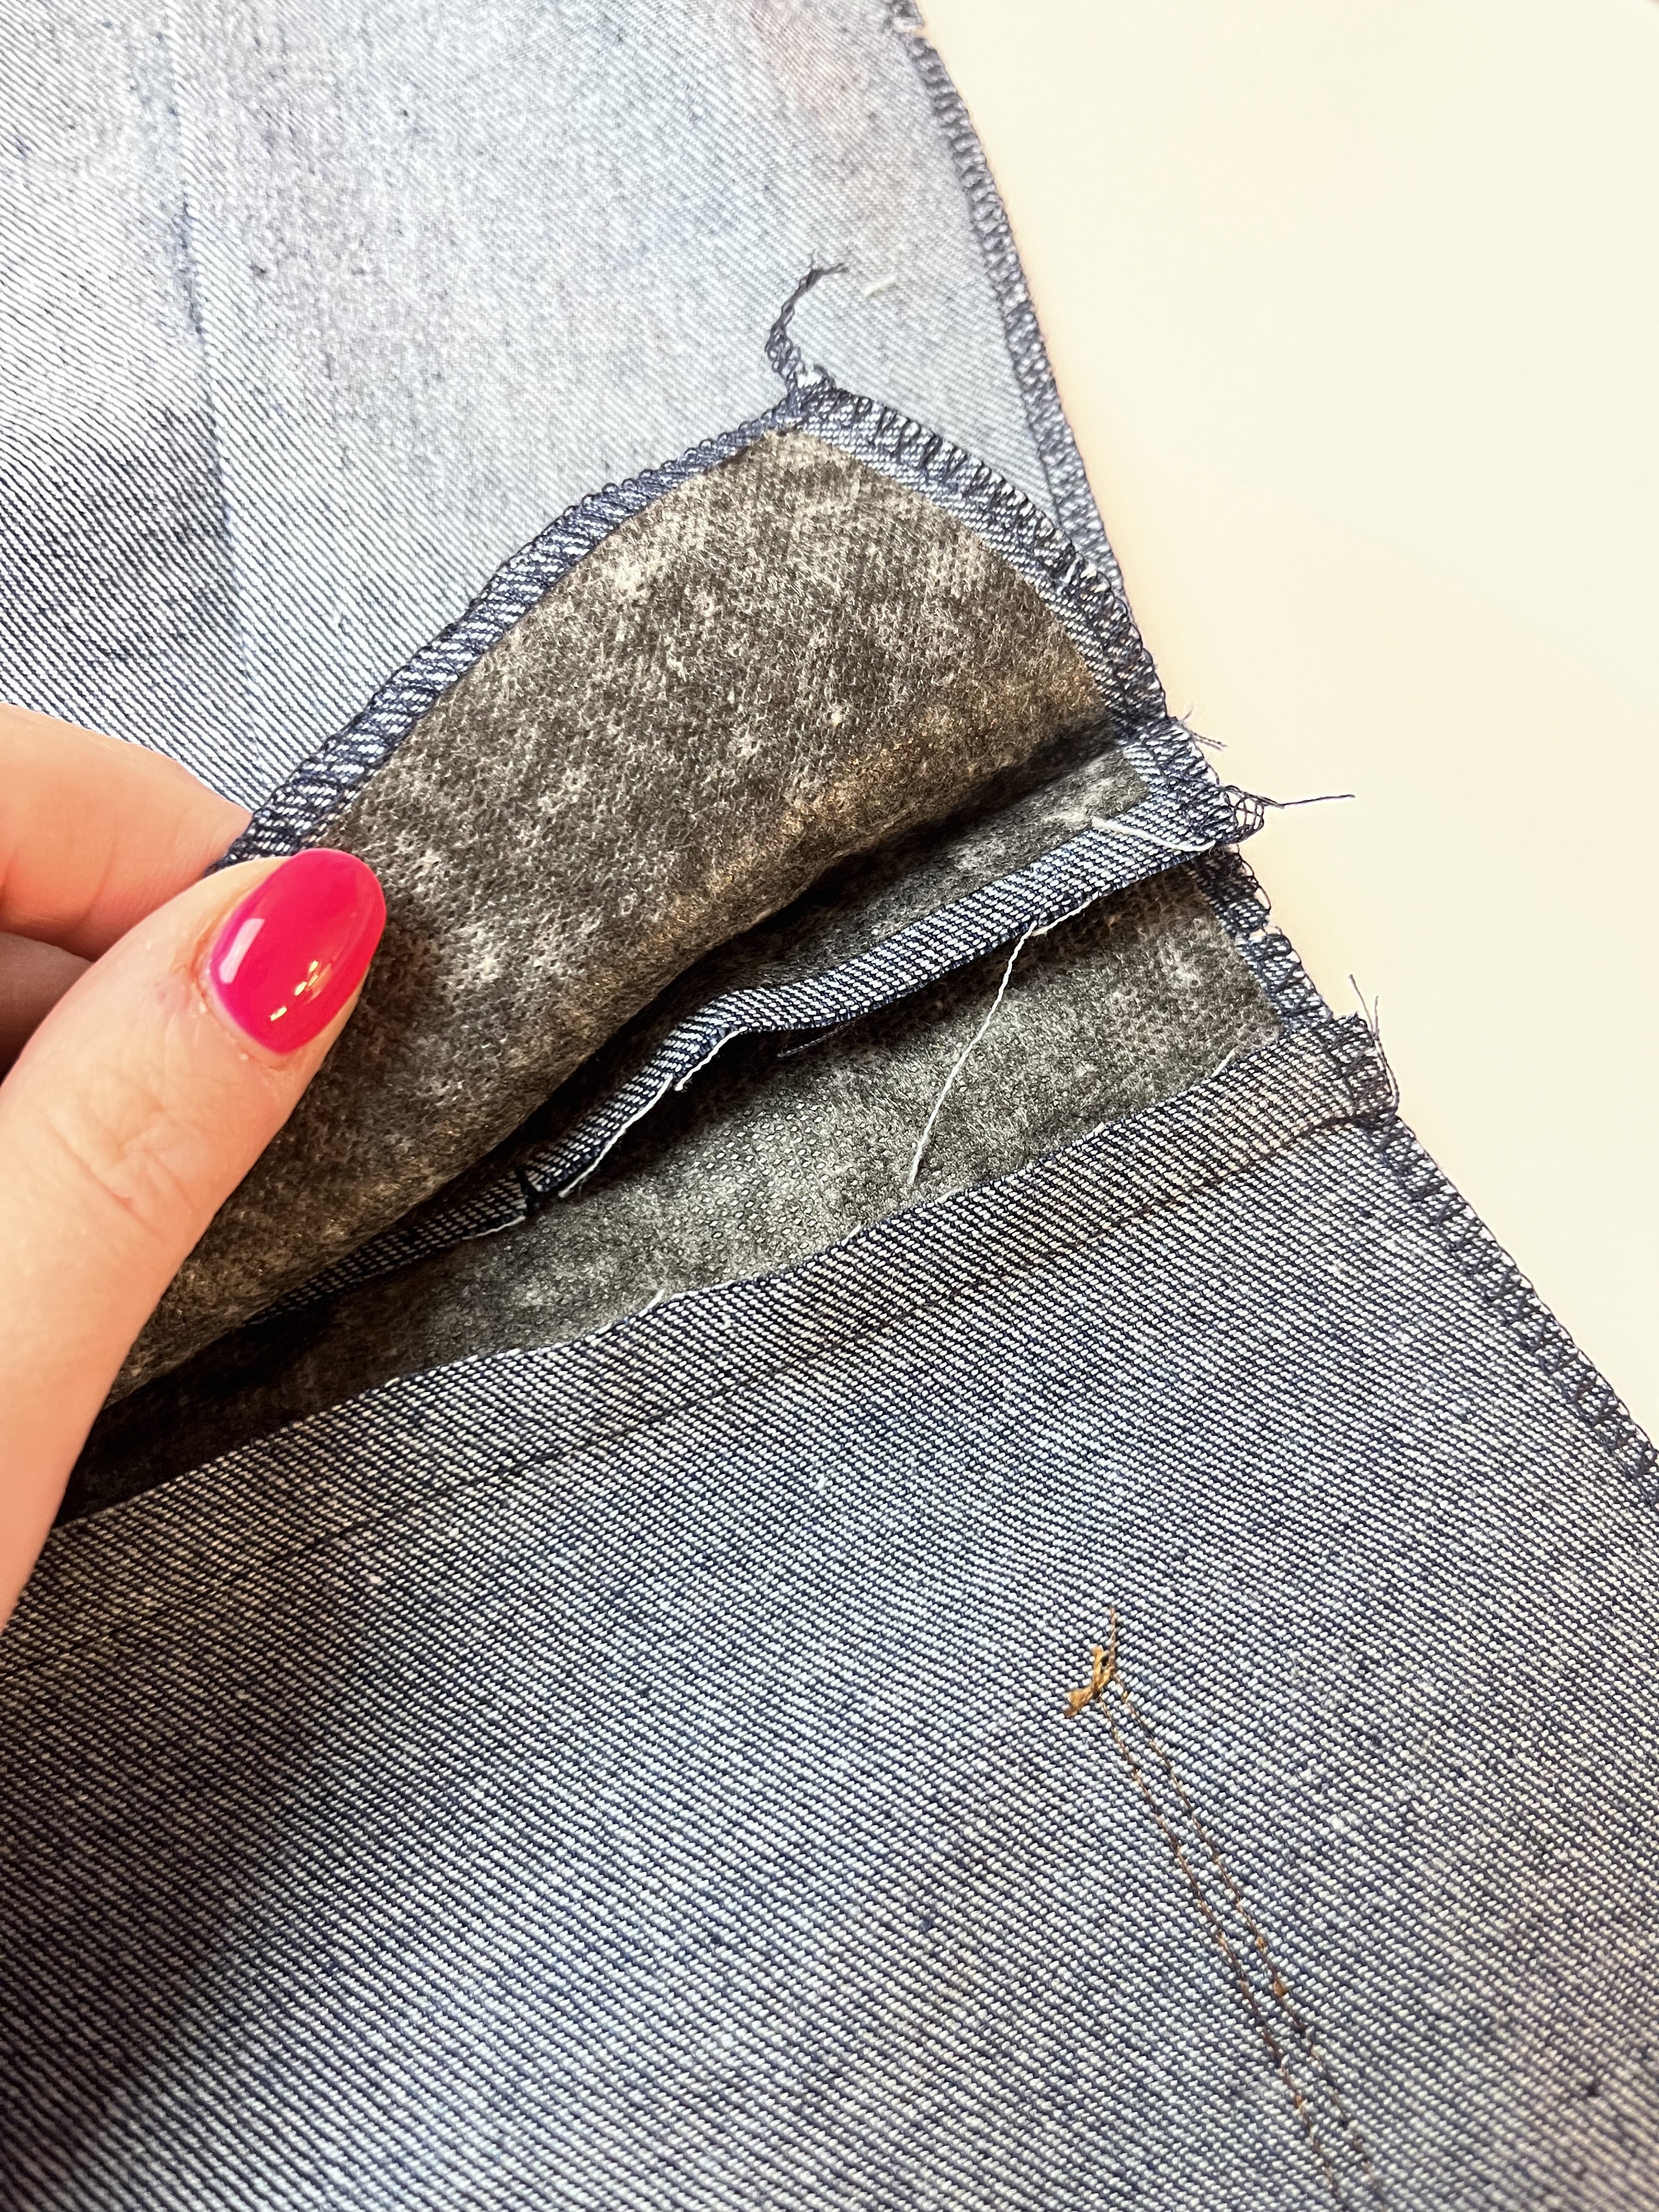
Fold the waistband facing down to cover the seams and pin in place from the wrong side.
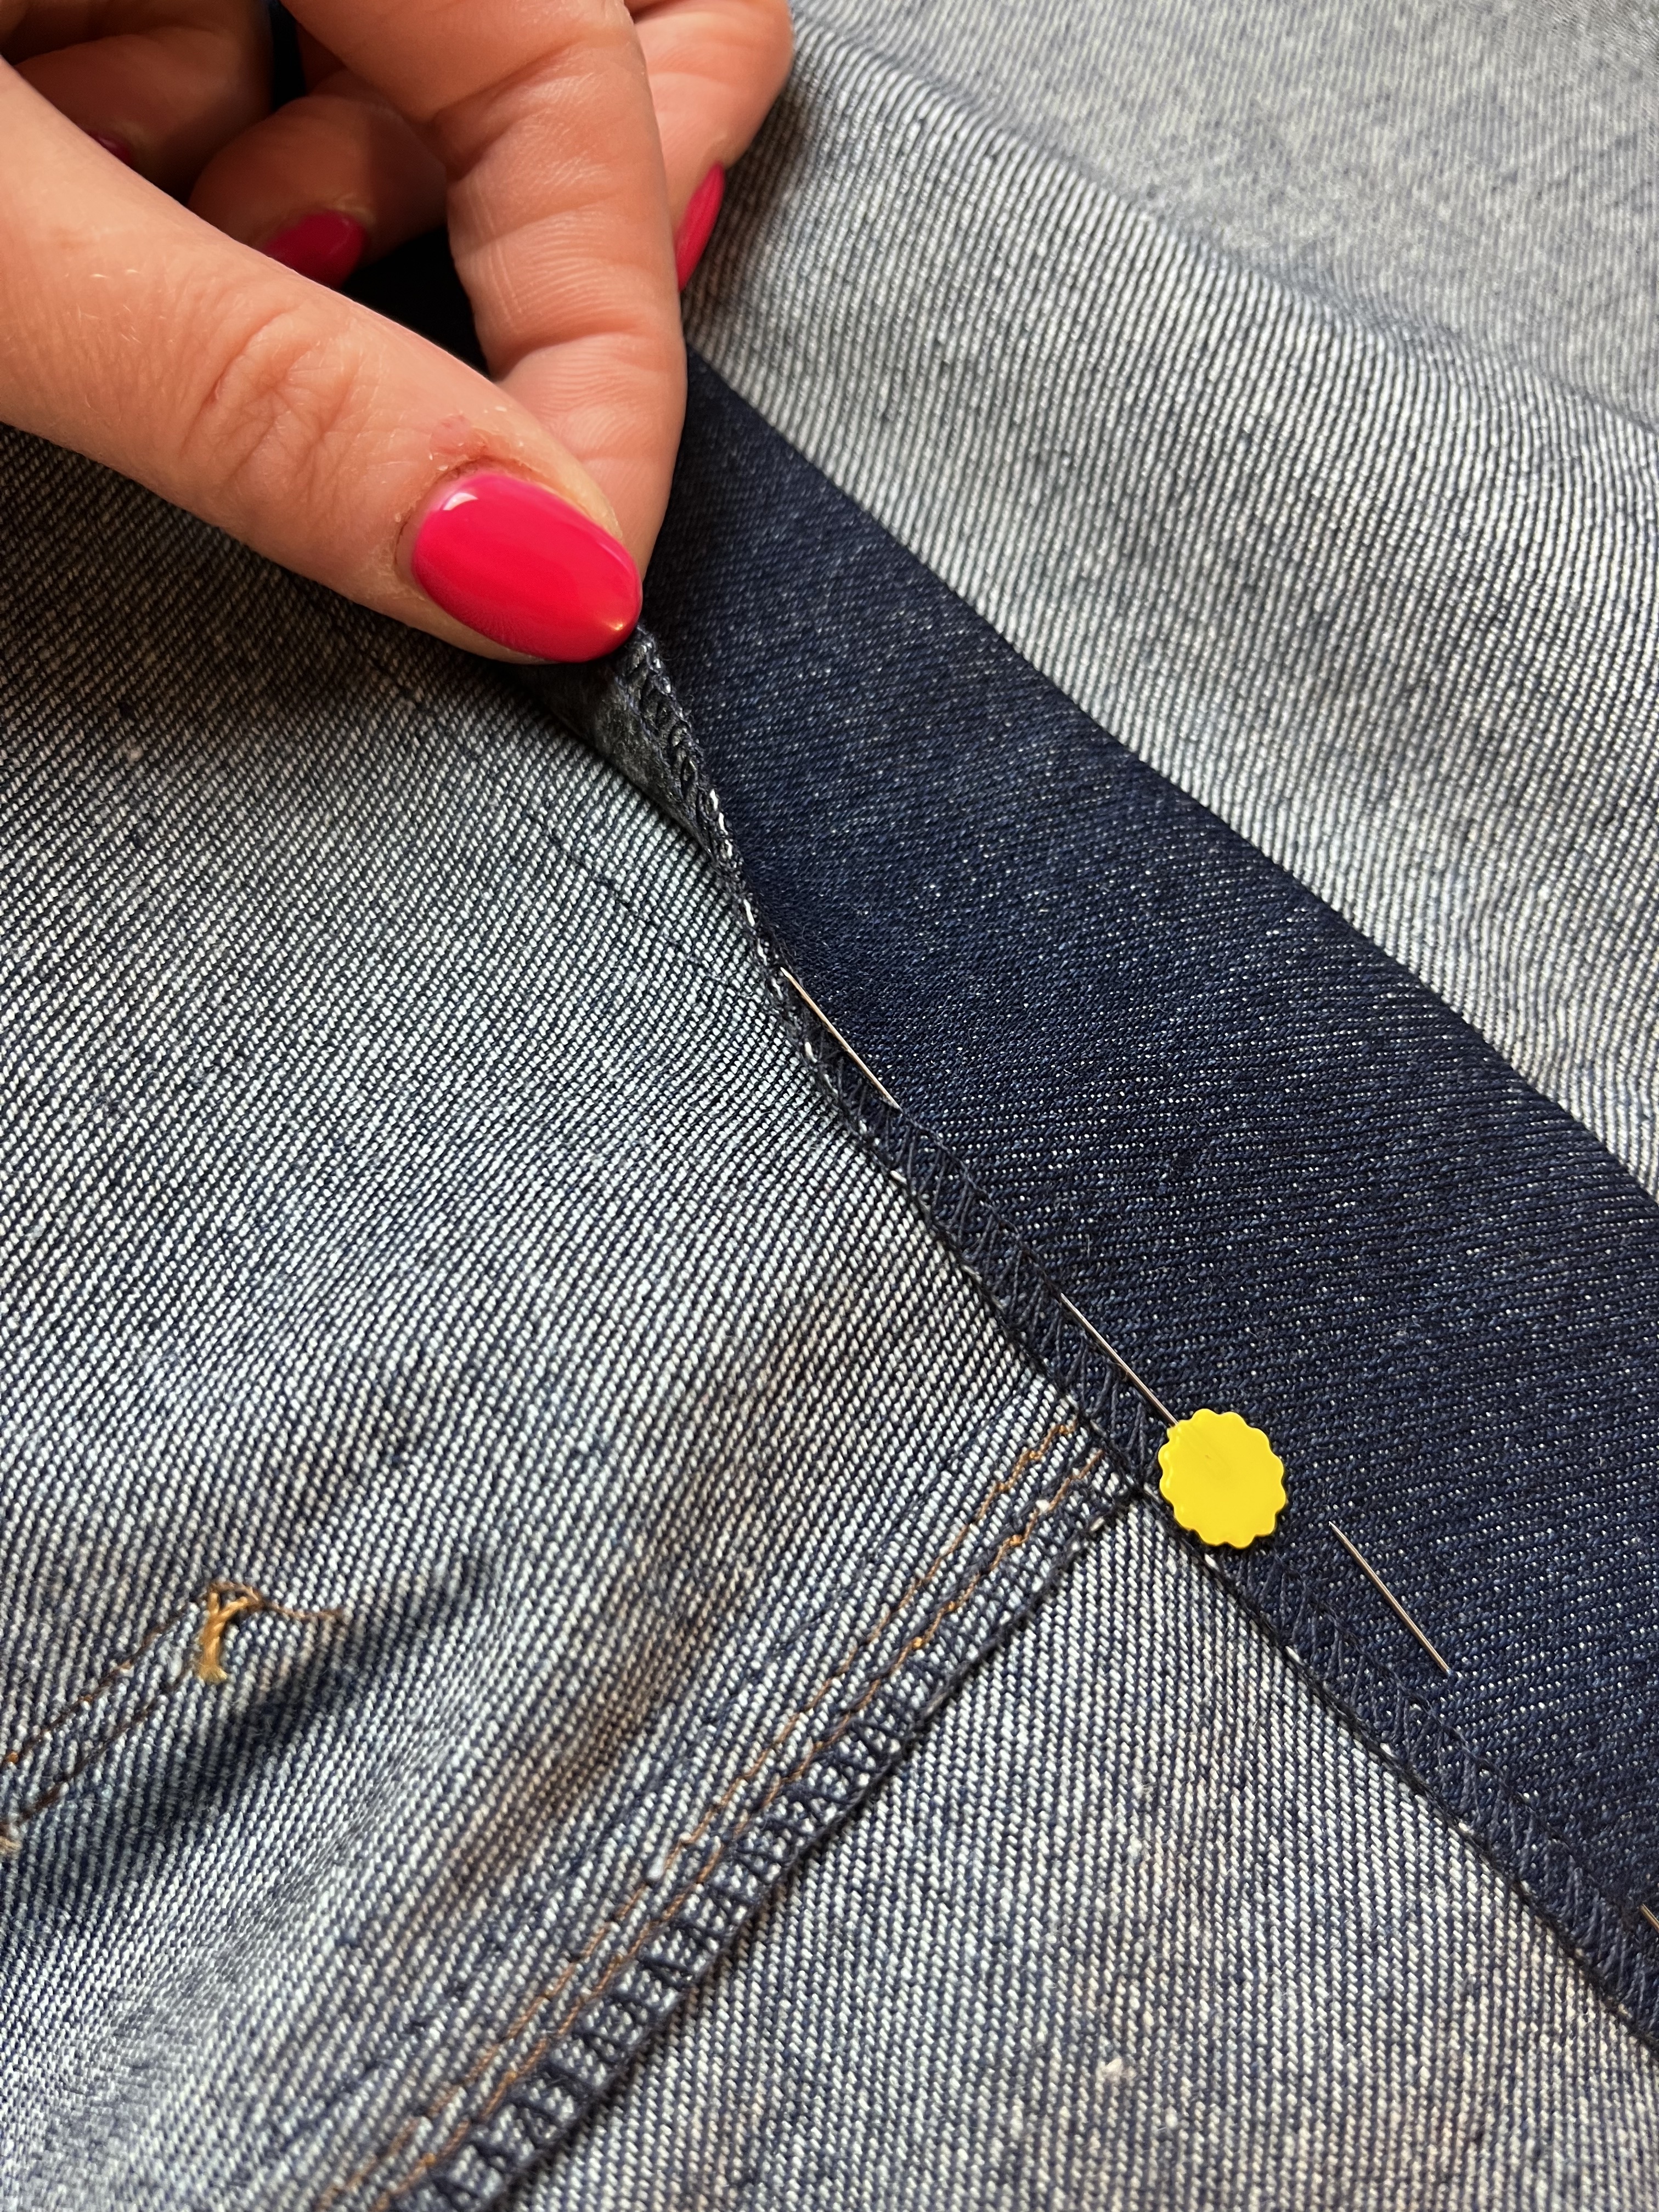
Transfer the pins to the outside.
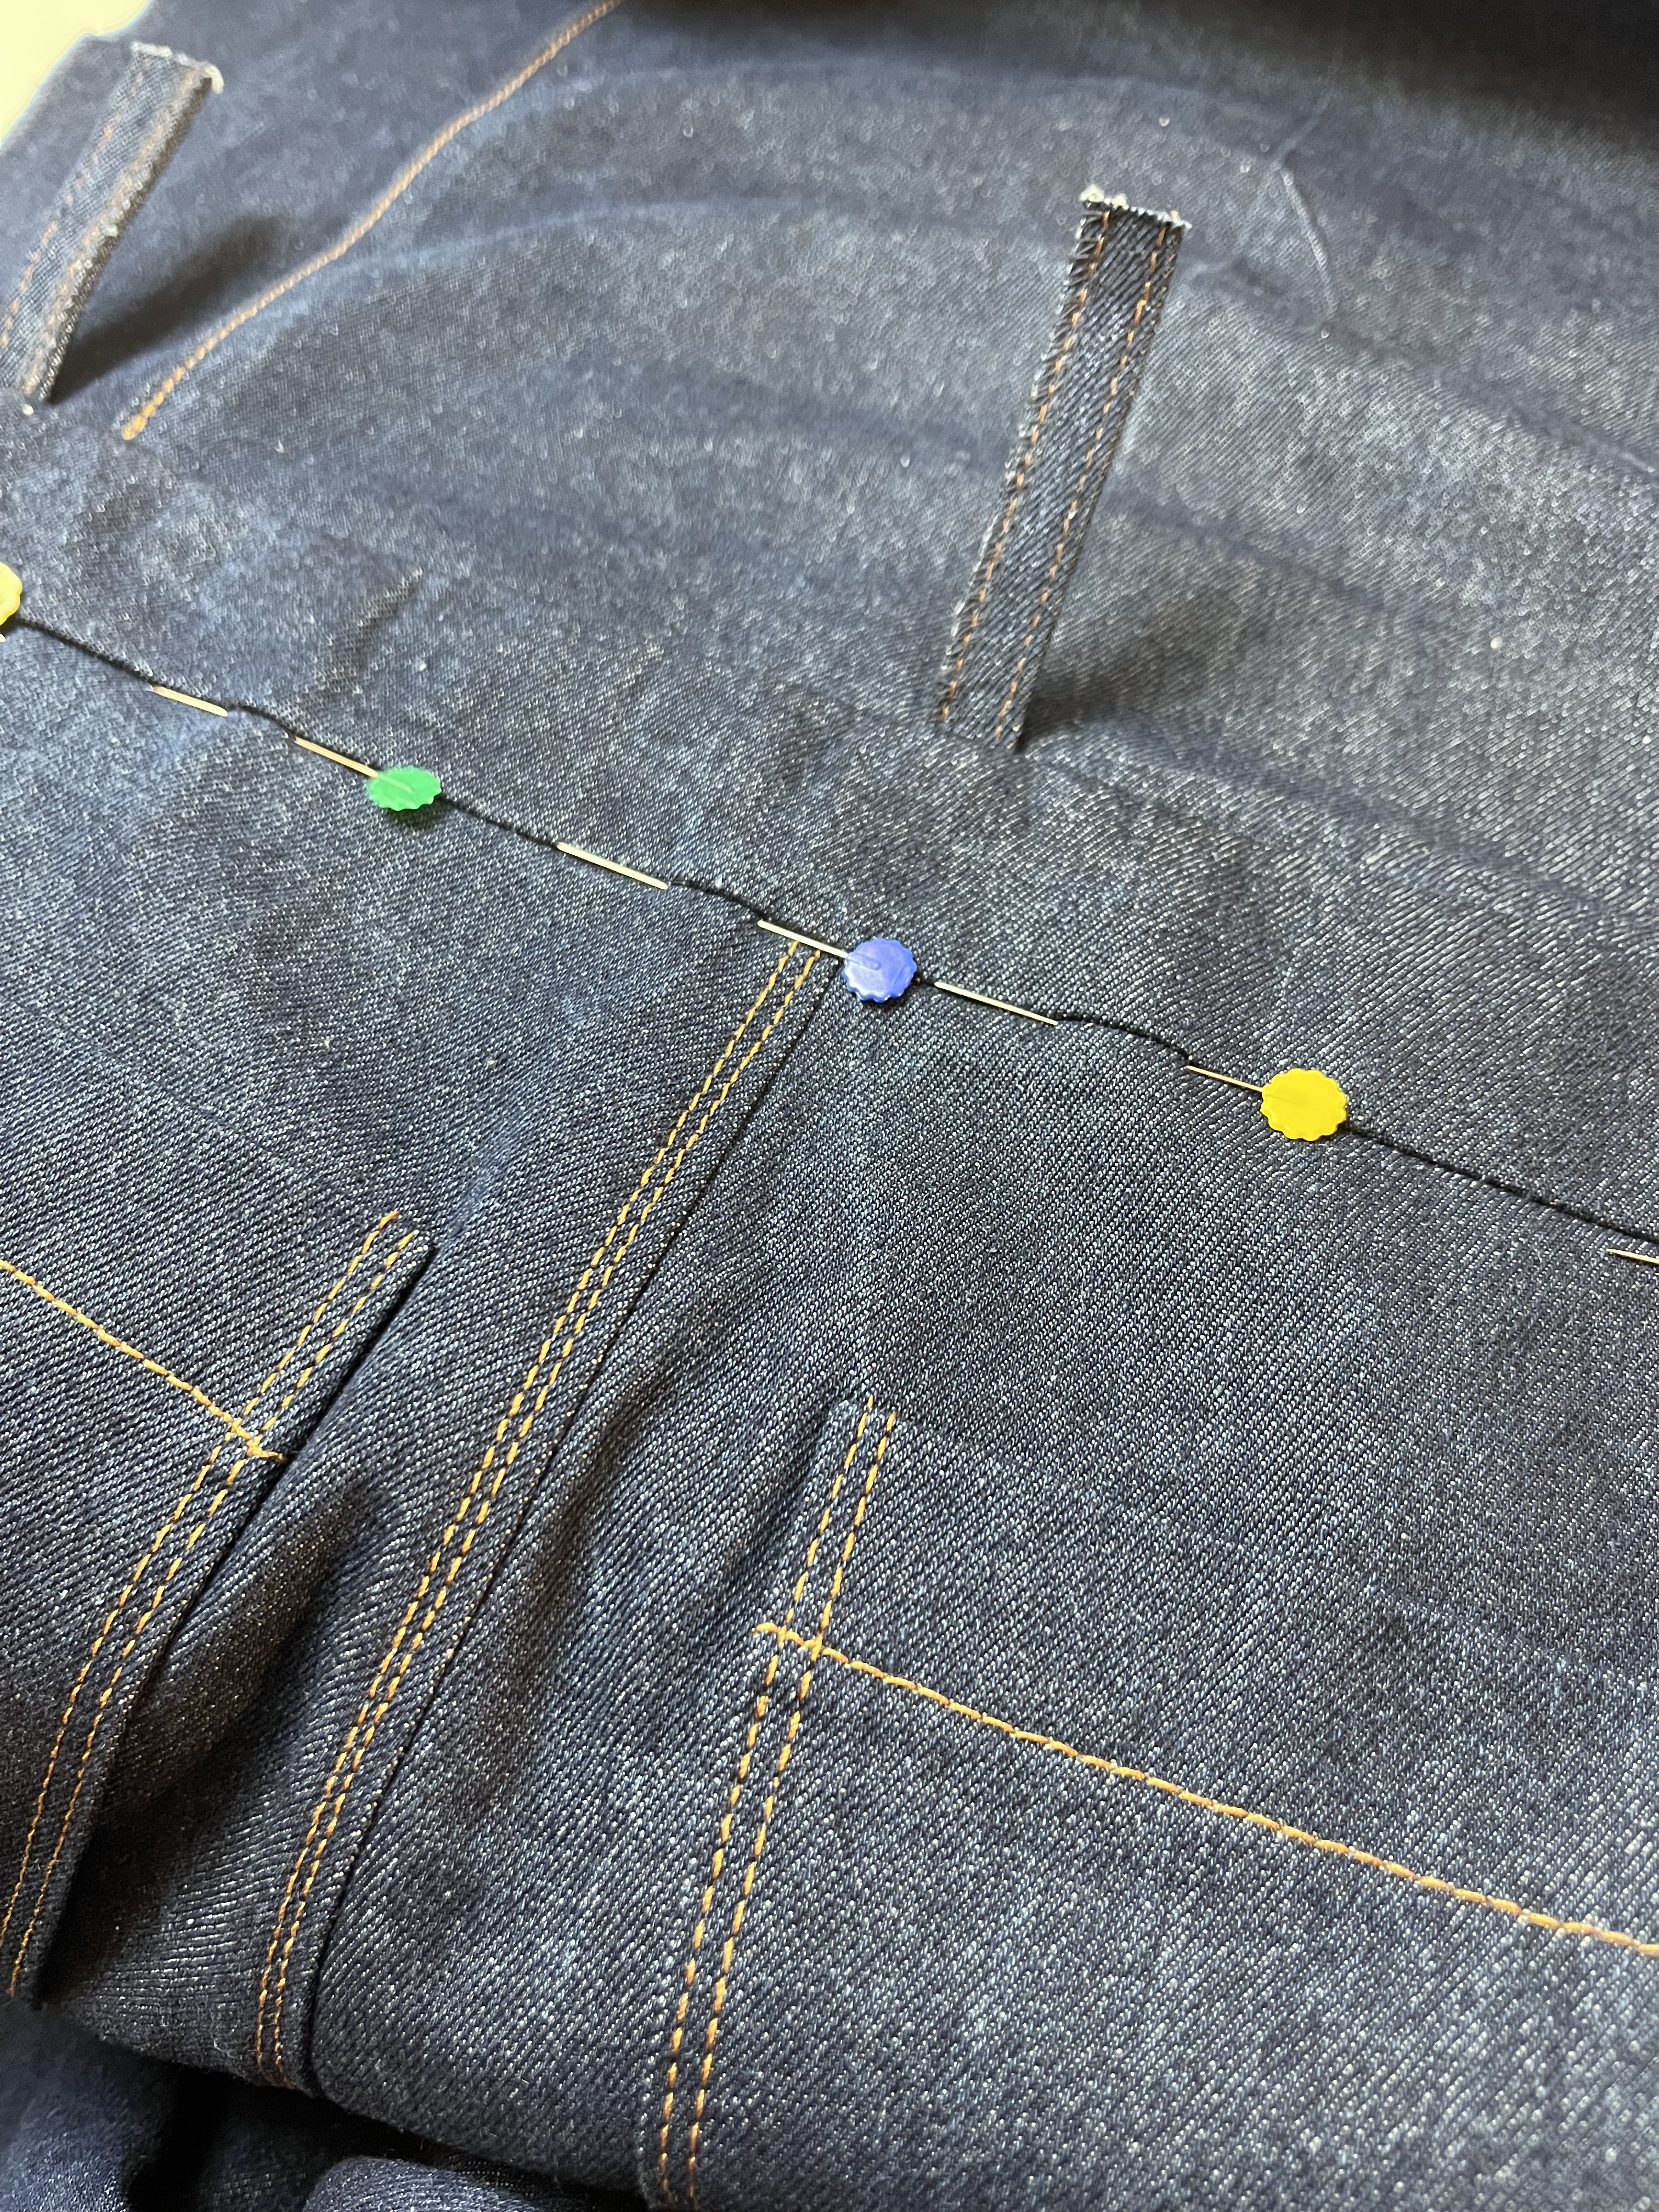
Stitch in the ditch to secure the waistband facing. You should have almost invisible stitching from the right side of the garment and a visible stitching line along the waist facing on the inside of the garment.
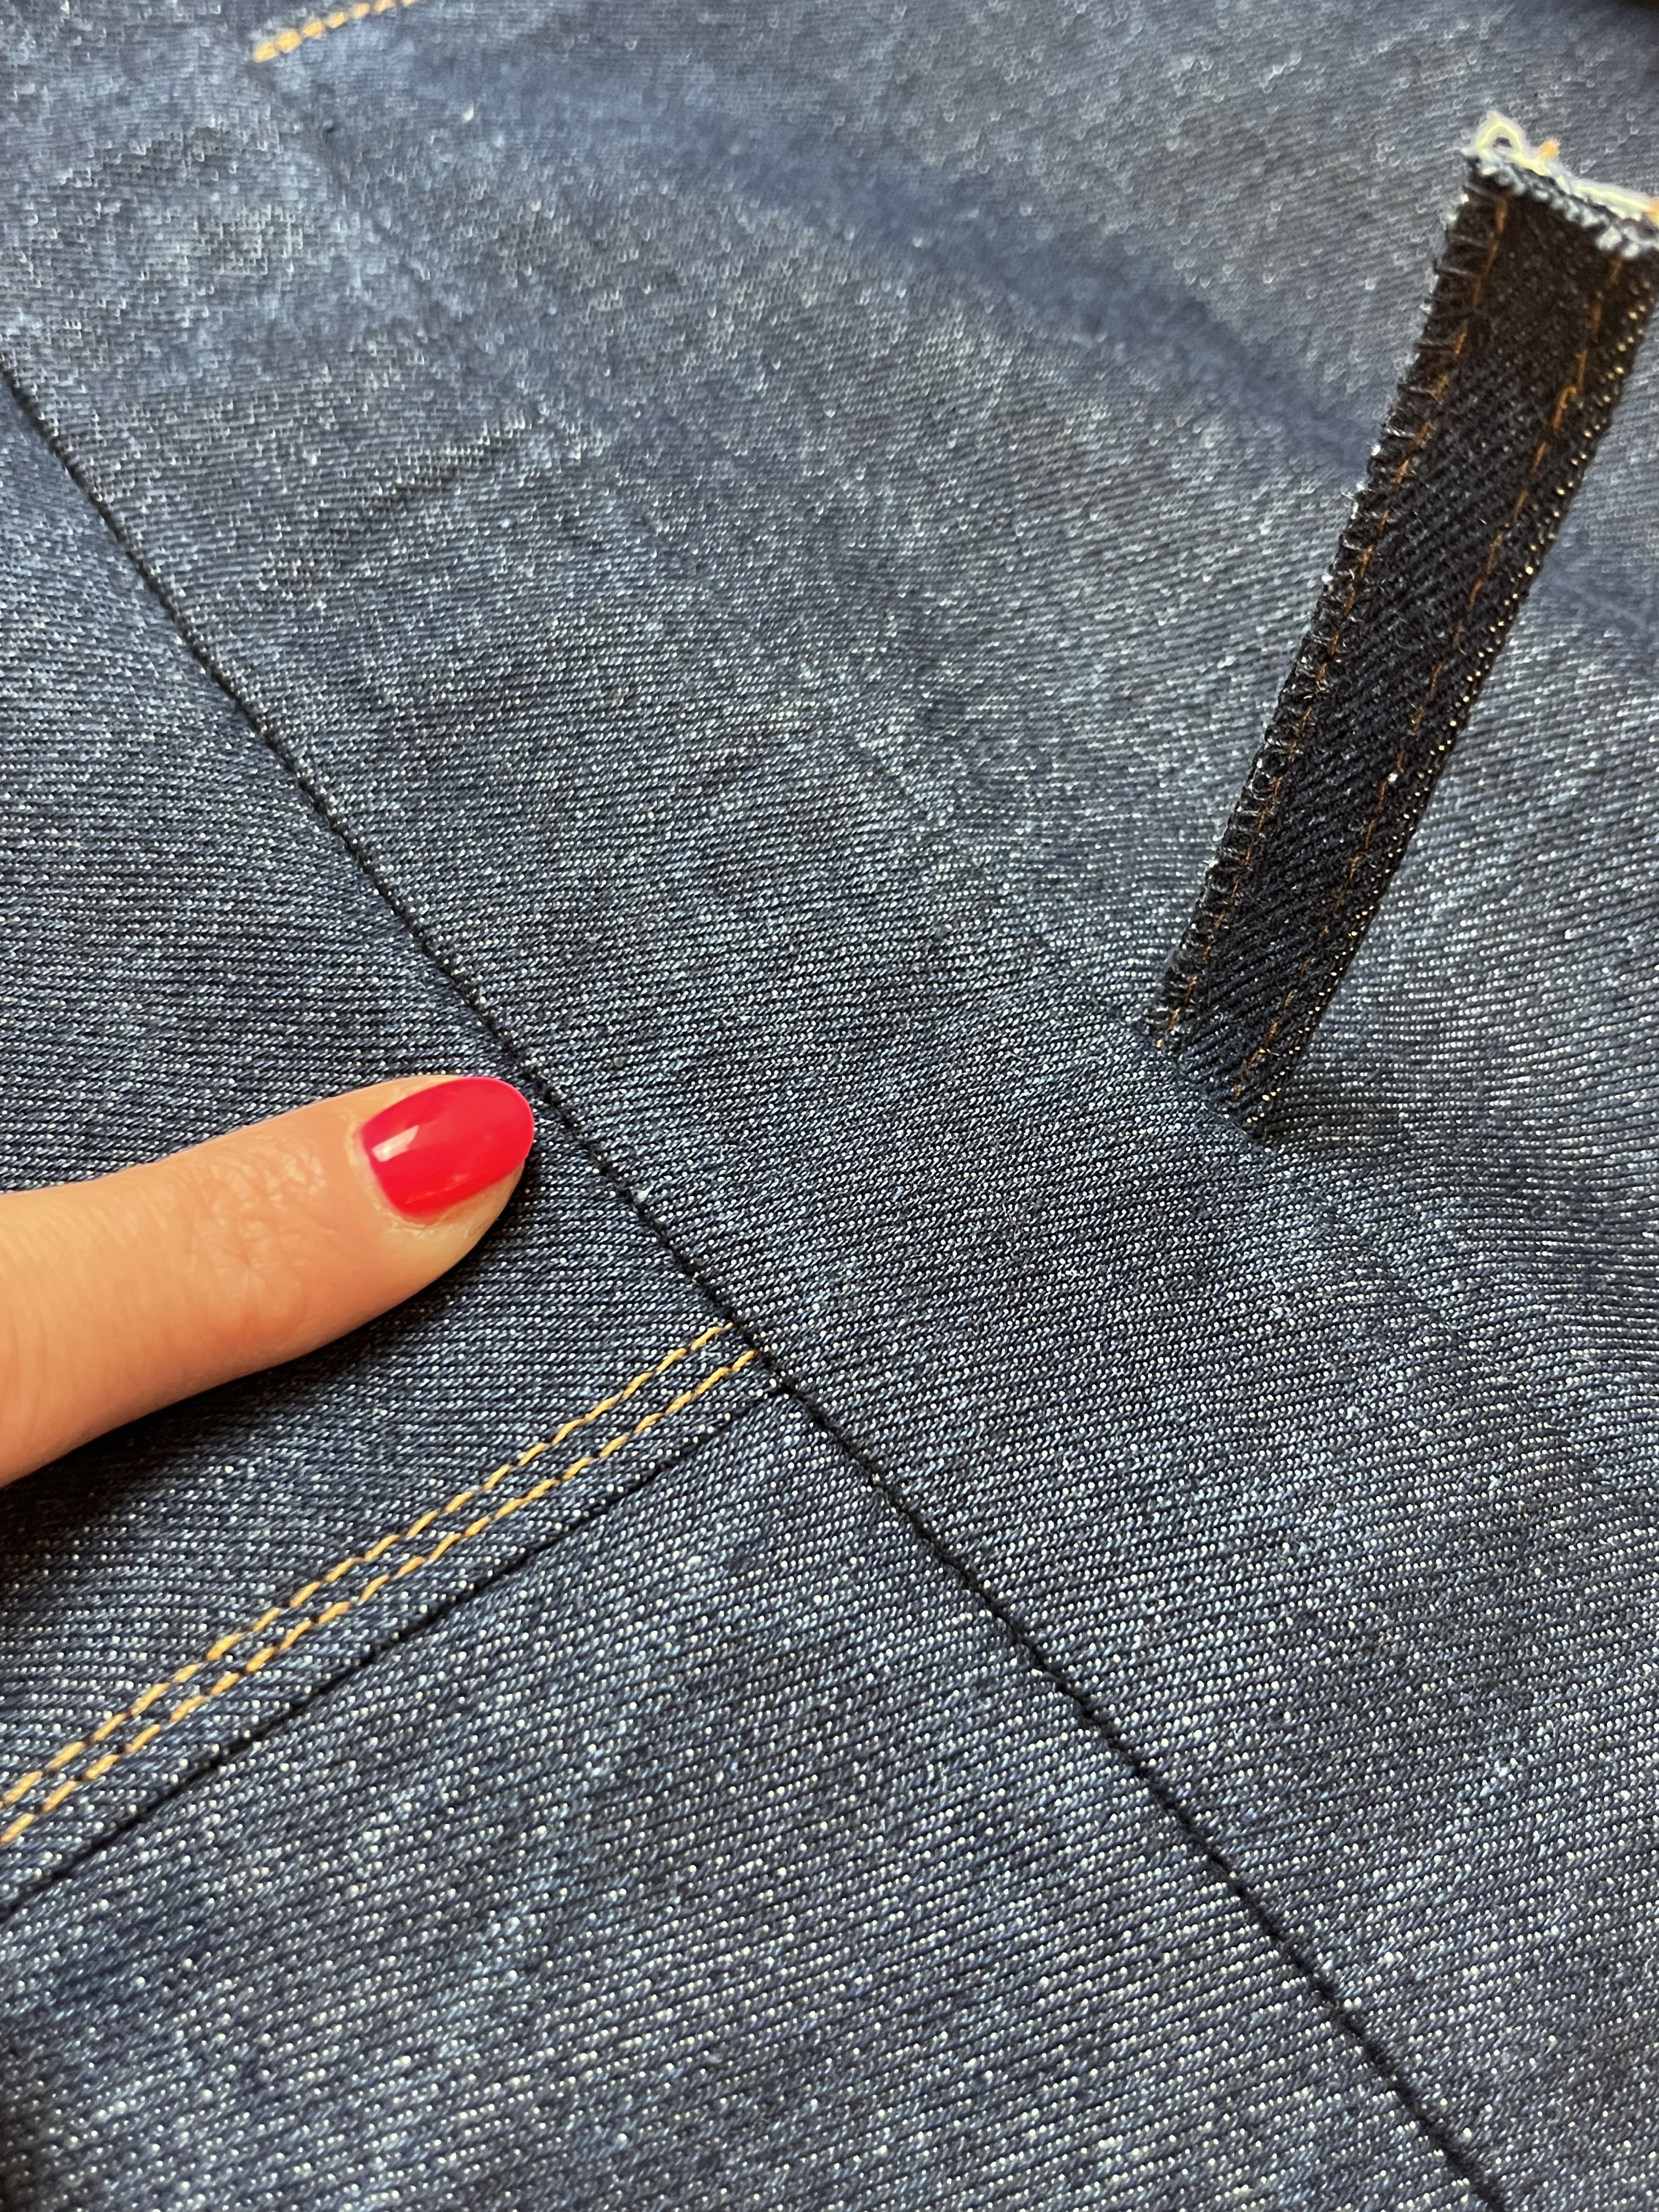
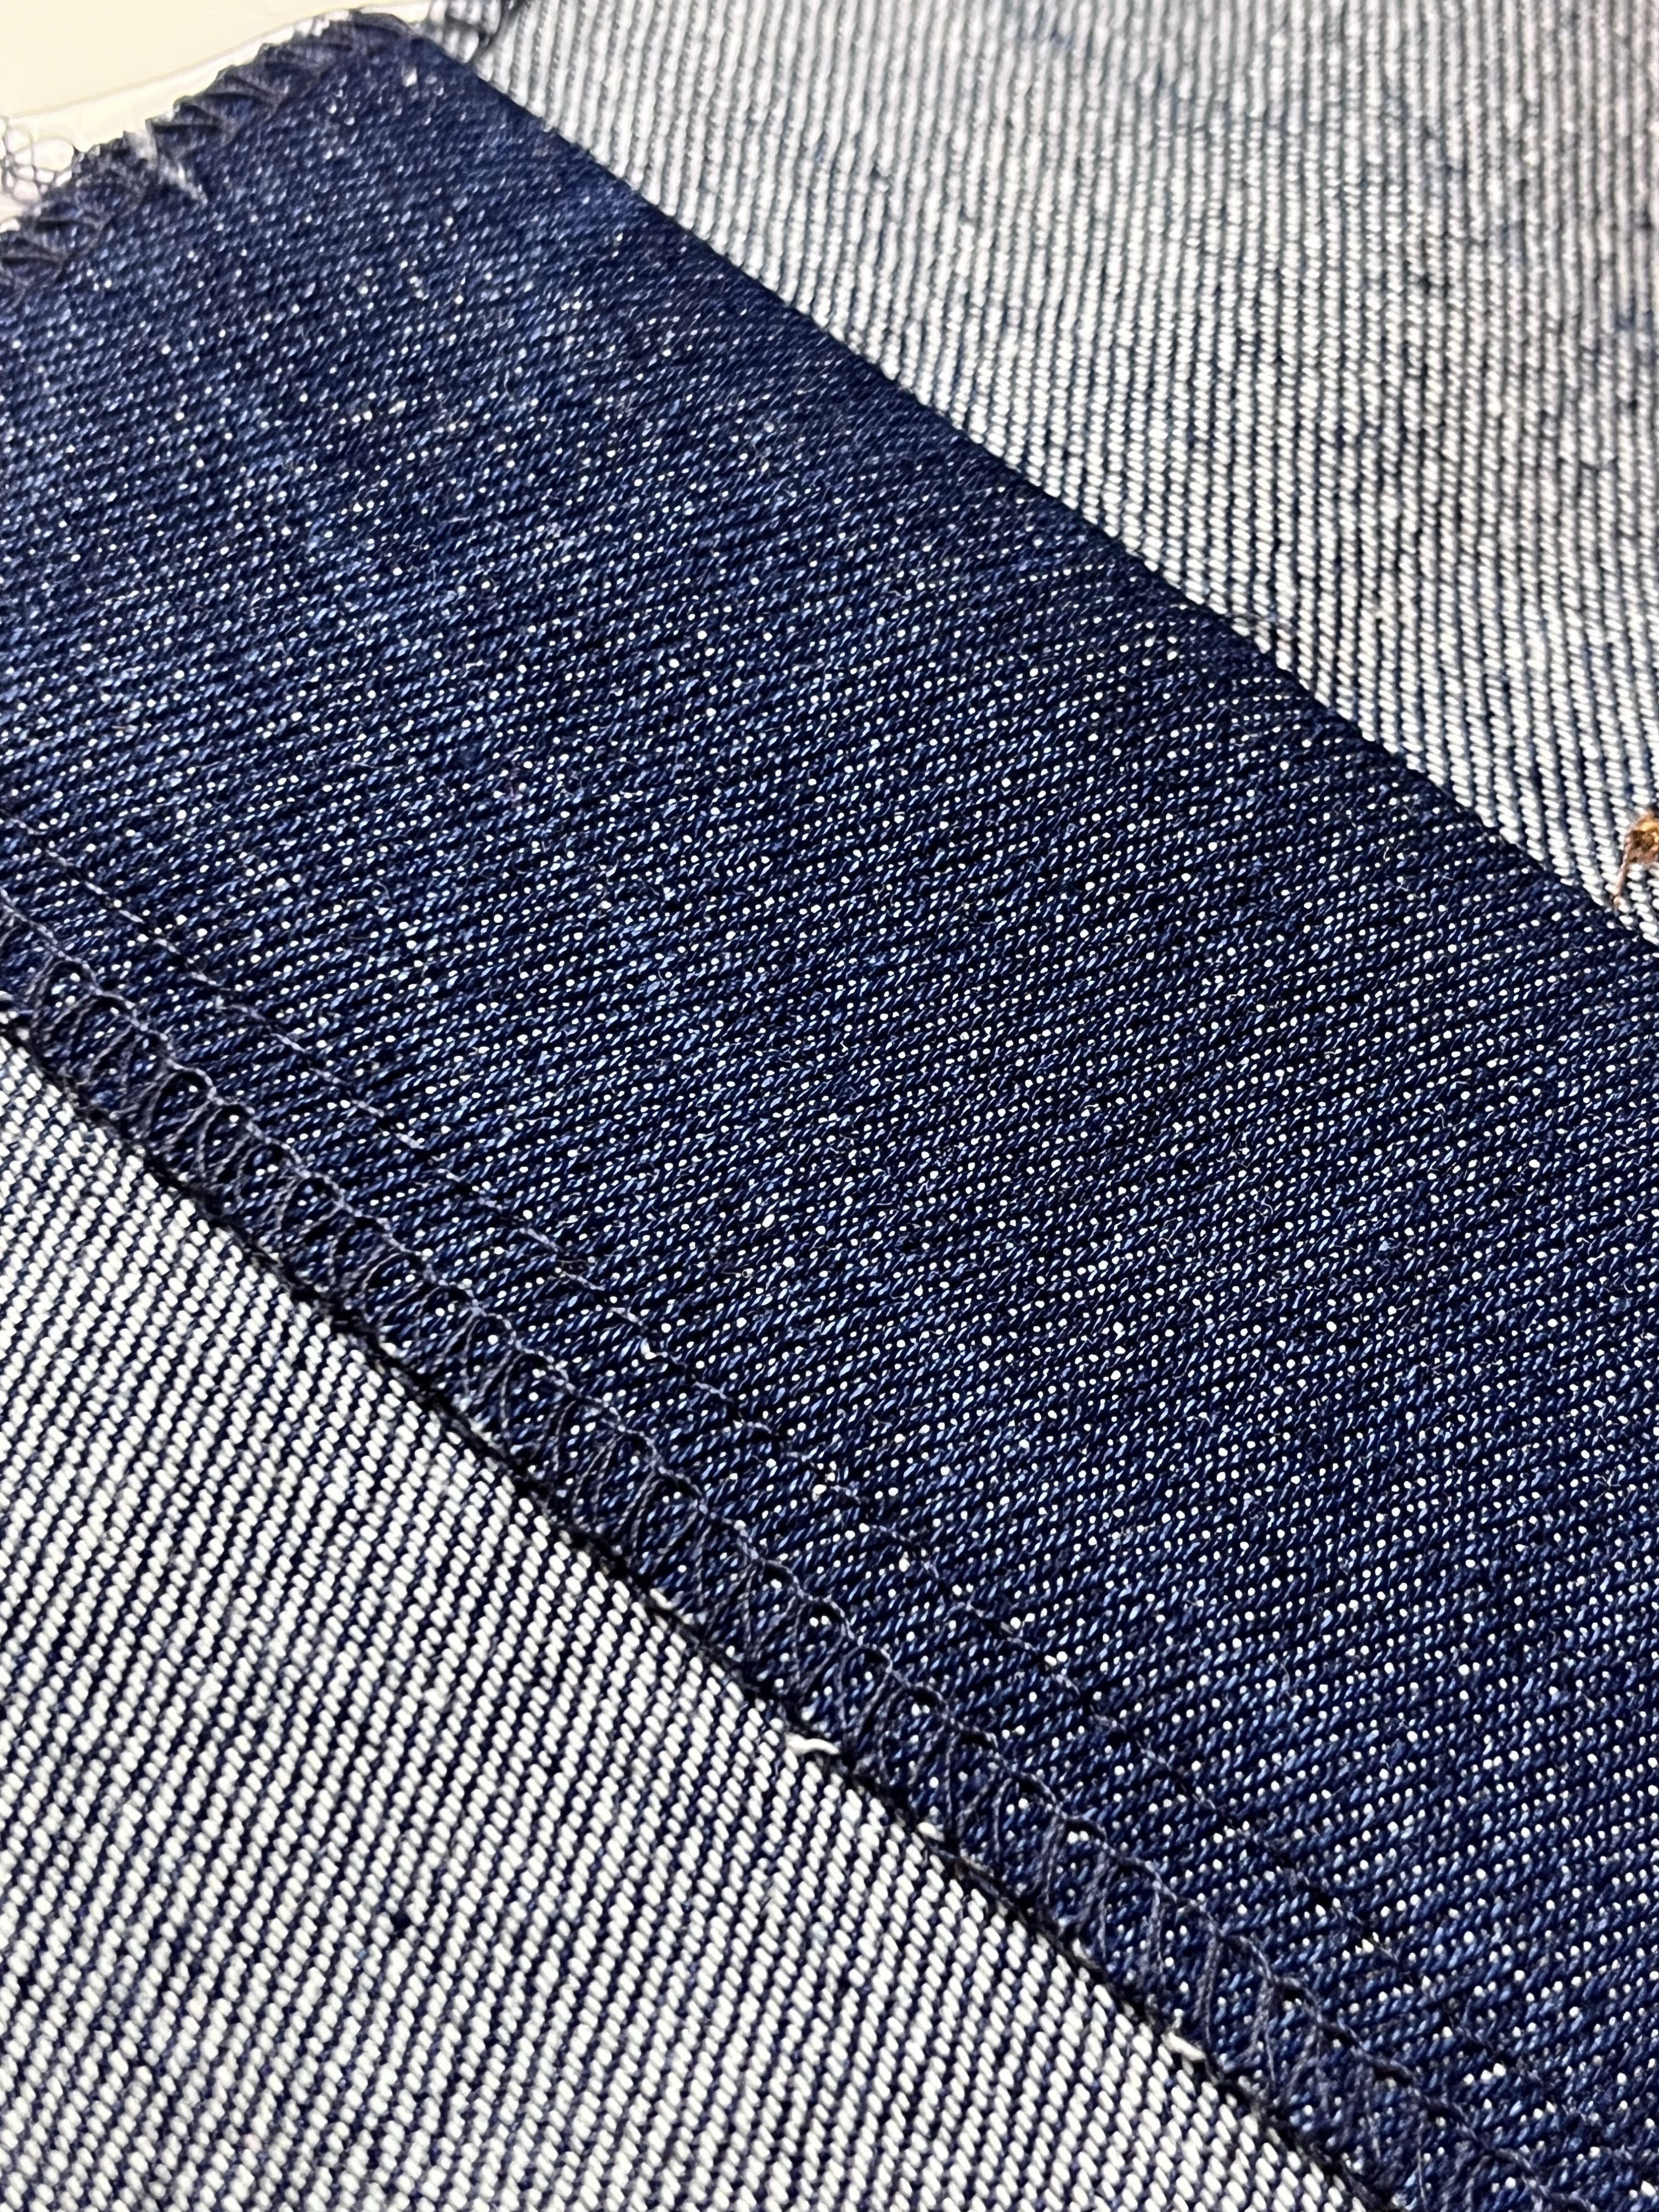
I inserted some Super Soft 38mm (1 ½” elastic) into the waistband channel to create a little waist shaping. The elastic is approximately 2.5cm (1”) shorter than the waistband).
Patch Pockets
When creating the patch pockets on the bodice and back leg, I took a slightly different approach to make a clean finish at the top opening edge.
I overlocked all the edges of the pocket to begin with then followed the method shown in my video ‘How to Sew a Patch Pocket’ which can be found on my YouTube channel here:
https://www.youtube.com/watch?v=AAd4LU5Cuxo&t=1s
Centre Front Zip
The centre front seam allowance is 19mm ( ¾”). I hand tacked (basted) the zip in place and then stitched from the right side, topstitching as explained in the instructions. You can see the method in my video ‘How to Insert a Centre Zip’ here: https://www.youtube.com/watch?v=YHIPbQskw9c&list=PLwZ3xX_GSI9wCw23Oe0sXeok1CHQGIj-8&index=3
Sleeves
Sew the sleeve hem before inserting the sleeve – it’s much easier this way.
More tutorials and videos on techniques can be found at www.houseofmisssew.com or https://www.youtube.com/c/HouseofMissSew/videos


