Coat with leather (ish) sleeves. Part one
Posted by Fabric Godmother on 1st Jan 1970
In my post My first download(able sewing pattern) I talked about the Wool coat I was going to make with the Burdastyle pattern 101B
I have made a start on the coat but with no images and a brief page of instructions it has been a big challenge, a bit like getting up in the middle of the night in a strange hotel and trying to find the bathroom without stitching on the light. You know it's there you just need to feel your way very slowly
The pattern is labelled as Intermediate, however due to the minimal instructions I would say only tackle this if you are confident with revere collars.
I cut the wool fabric out no problem, but when it came to the faux leather (can I just say here I hate the word Pleather, anyone else?)there was more of a challenge. Pinning the fabric would leave holes and my chalk was simply not leaving a mark on the fabric. The solution was to turn the fabric inside out, so that the chalk would work and use weights to hold it down and draw round it that way round.
The first issue was sewing in the side pieces, with no notches on the pattern I couldn't tell which bit went in which side, eventually I just guessed and it seems to have all pulled together ok.
When I put the pockets in I found that using my zipper foot and moving the needle position meant that I could get much closer to the seam (the fabric I am using is pretty thick and getting it under a normal foot was tricky.
The next big step was the collar, after searching through every website and old pattern that mentioned revere collars it wasn't much clearer so I just followed the steps one at a time, tacking in place as I went to make sure the next bit made sense before committing it to my machine.
Even with the slow small steps I am not happy with how the collar has come out. There is a bit of a bump where the stand and the collar meet, so I think I am going to go back and unpick it and start again. What a pain but it is such beautiful fabric I want it to be perfect (ish)
I am a self confessed lazy sewer, however if you are planning on making this coat I would really recommend making a toile first out of something like calico to make sure you have got it right.
Keep your eyes out for part two coming soon to see how the revised collar looks!
Happy sewing xxx
I have made a start on the coat but with no images and a brief page of instructions it has been a big challenge, a bit like getting up in the middle of the night in a strange hotel and trying to find the bathroom without stitching on the light. You know it's there you just need to feel your way very slowly
The pattern is labelled as Intermediate, however due to the minimal instructions I would say only tackle this if you are confident with revere collars.
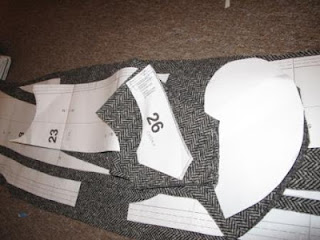 |
| Here are all of the pieces cut and ready to go |
 |
| Cutting out the sleeves |
When I put the pockets in I found that using my zipper foot and moving the needle position meant that I could get much closer to the seam (the fabric I am using is pretty thick and getting it under a normal foot was tricky.
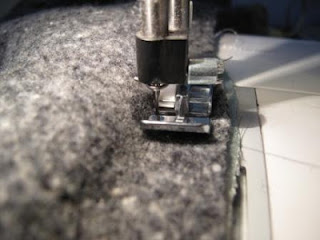 |
| Using the zipper foot meant I could get right into the seams |
Even with the slow small steps I am not happy with how the collar has come out. There is a bit of a bump where the stand and the collar meet, so I think I am going to go back and unpick it and start again. What a pain but it is such beautiful fabric I want it to be perfect (ish)
I am a self confessed lazy sewer, however if you are planning on making this coat I would really recommend making a toile first out of something like calico to make sure you have got it right.
Keep your eyes out for part two coming soon to see how the revised collar looks!
 |
| Looks ok from the back |
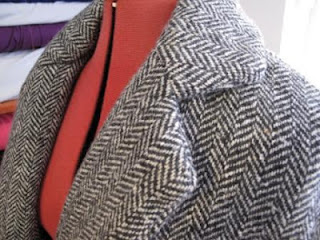 |
| Not bad from the front... |
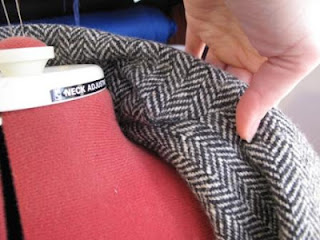 |
| But wait, what is that big lump inside? |
Happy sewing xxx
